



Ready for the ultimate cloud security synergy? The integration of Google SecOps and Wiz Defend is here to elevate your security game. This powerful combination delivers centralized visibility by feeding all Wiz cloud detections into a single pane of glass within Google SecOps. We are streamlining investigations by automatically grouping related alerts to reduce alert fatigue, and powering automated contextualization with AI-driven verdicts from Blue Agent Analysis. Your team gets immediate, deep forensic evidence without the manual evidence gathering. This is just step one of our integration — stay tuned for way more to come!
The Goal
The goal of this guide is to provide a comprehensive, step-by-step walkthrough for configuring
a robust integration between Wiz Defend and Google Security Operations (SecOps). By
following these instructions, users will successfully establish data ingestion, configure
automated alert grouping, and implement an automated response playbook to leverage
AI-driven analysis.
High-Level Description
The process involves four main phases:
- Data Ingestion: Establishing the secure connection to send Wiz Defend detections directly into the Google SecOps platform using native UDM (Unified Data Model) mapping.
- Integration & Content Setup: Installing the necessary connectors, integration applications, and out-of-the-box (OOTB) content packs within SecOps to ensure the data is parsed and actionable.
- Alert Grouping (SOAR): Configuring grouping rules within SecOps SOAR to logically cluster related Wiz detections (e.g., those sharing the same threat) into unified, manageable cases.
- Automated Analysis (Playbooks): Creating a SOAR playbook that automatically triggers the "Get Blue Agent Analysis" action on incoming Wiz alerts, enriching the case with deep, AI-driven context.
Outcomes
Upon successful completion of this guide, your organization will achieve:
- Centralized Visibility: All Wiz security detections will stream into Google SecOps, providing a single pane of glass for cloud threats.
- Streamlined Investigation: Related Wiz detections will be intelligently grouped into unified cases based on their underlying threat IDs, reducing alert fatigue and analyst screen-switching.
- Automated Contextualization: Every Wiz case will be automatically enriched with the "Blue Agent Analysis," providing SOC analysts with immediate, deep context, forensic evidence, and AI-driven verdicts without manual evidence gathering.
Detailed Step-by-Step Guide
Phase 1: Configure Data Ingestion (Wiz to SecOps)
Before alerts can be grouped or analyzed, the raw data must flow from Wiz to Google SecOps.
For the official Google documentation on configuring the Wiz data sending into SecOps, please refer to the Wiz.io Default Parser Guide.
Prerequisites:
● You must have administrative access to both the Wiz portal and the Google SecOps console.
● You need to obtain your Google SecOps Customer ID and an Ingestion Authentication File.
Step 1: Obtain Google SecOps Credentials
- Sign in to the Google SecOps console.
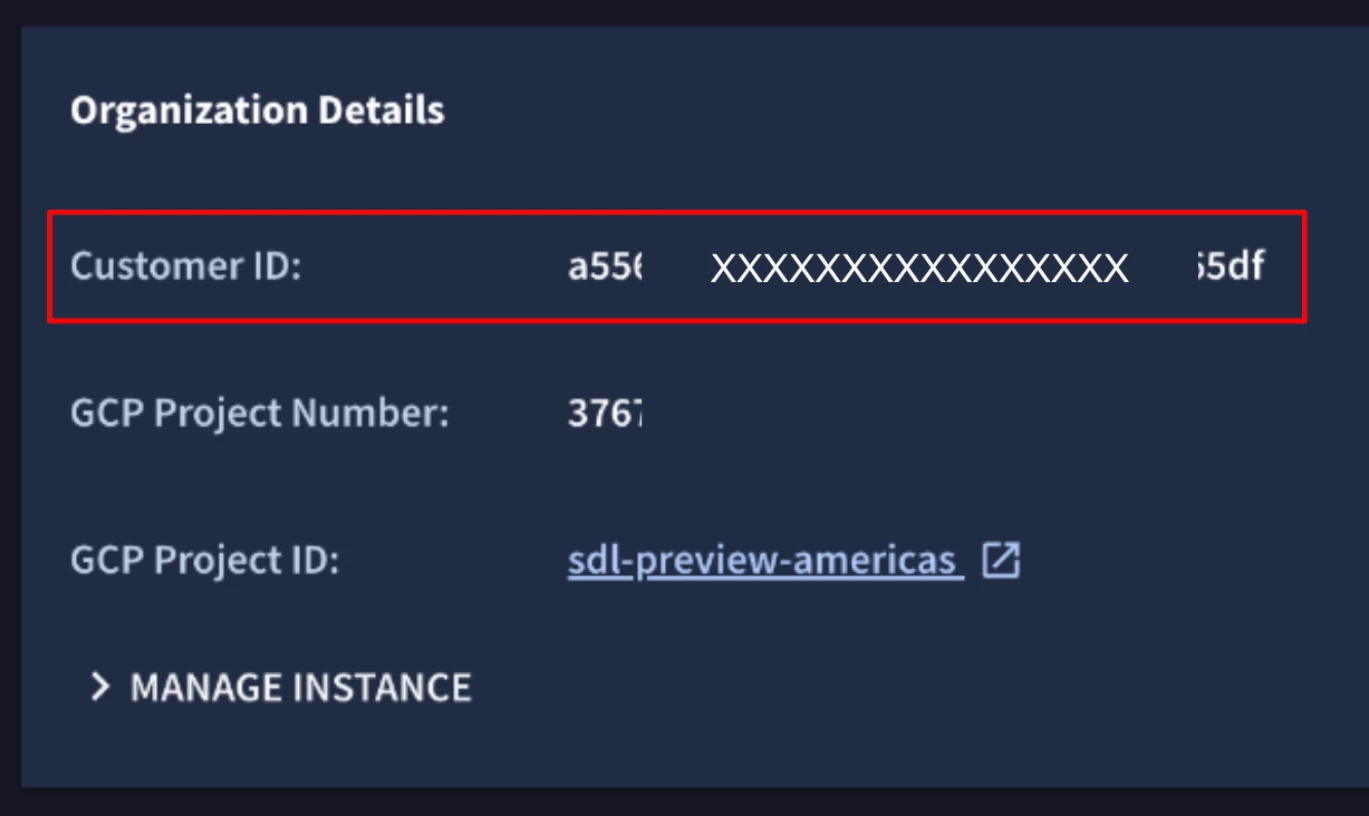
- Navigate to SIEM Settings > Profile.
- Copy and securely save the Customer ID from the Organization Details section.
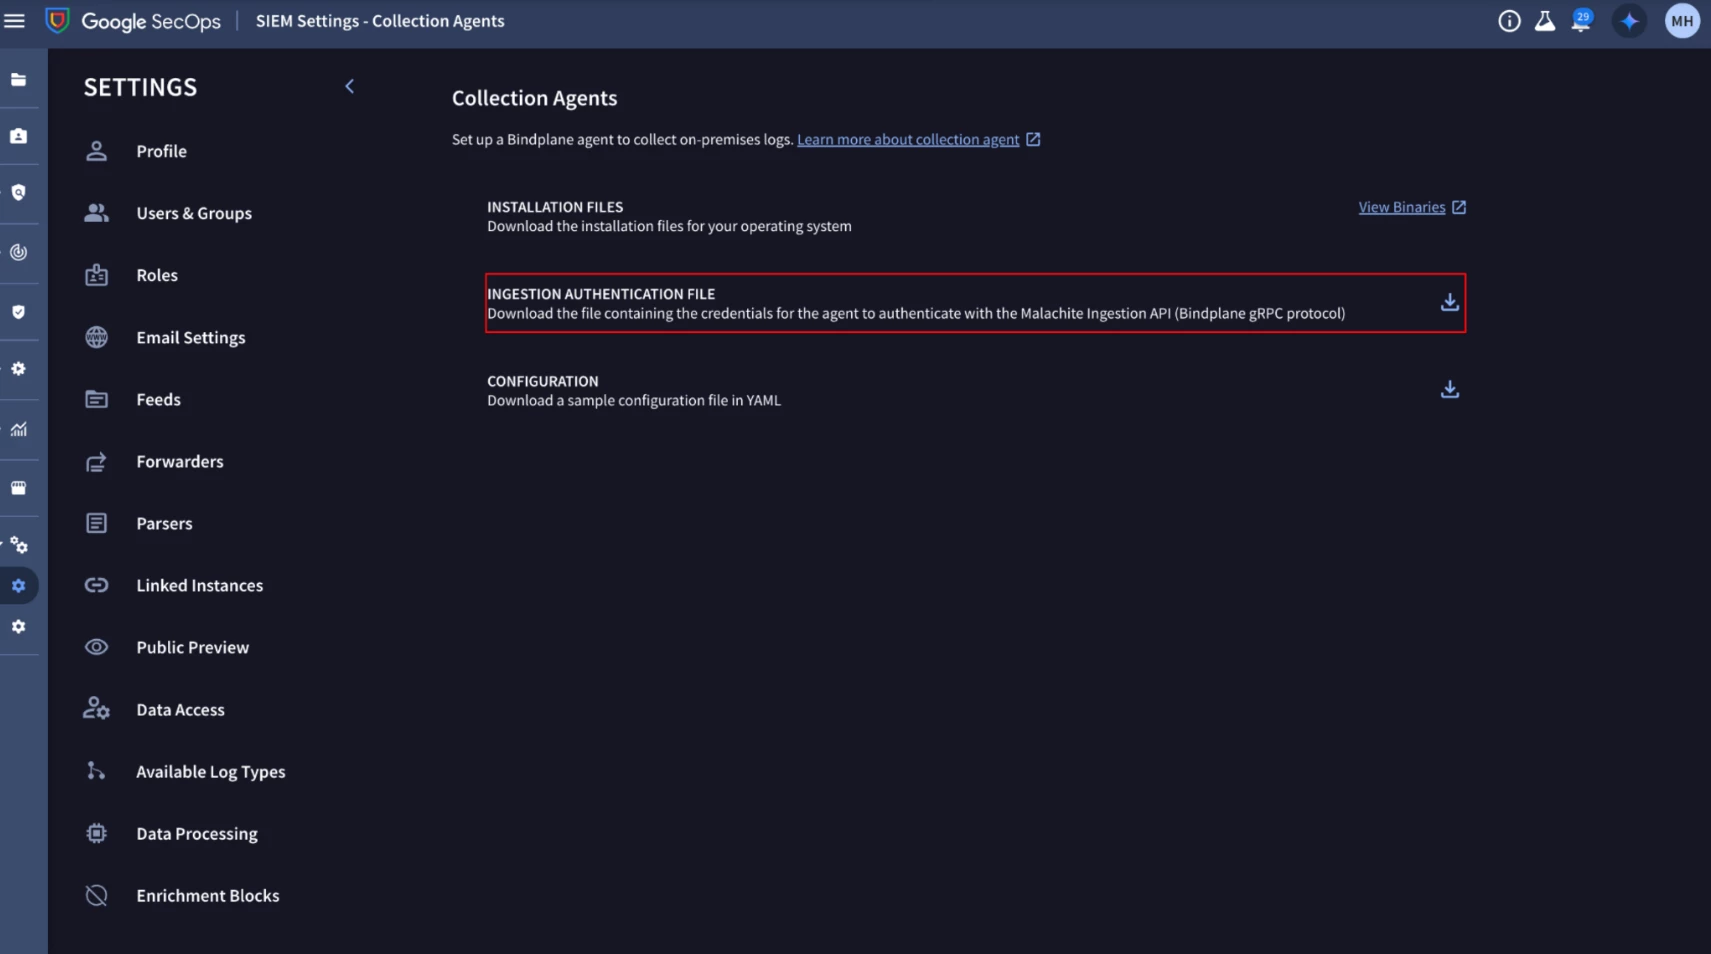
- Navigate to SIEM Settings > Collection Agents.
- Download the Ingestion Authentication File and save it in a secure, accessible location.
Step 2: Configure the Integration in Wiz
- Sign in to the Wiz web UI.
- Navigate to Settings > Deployments (or the Connect to Wiz page).
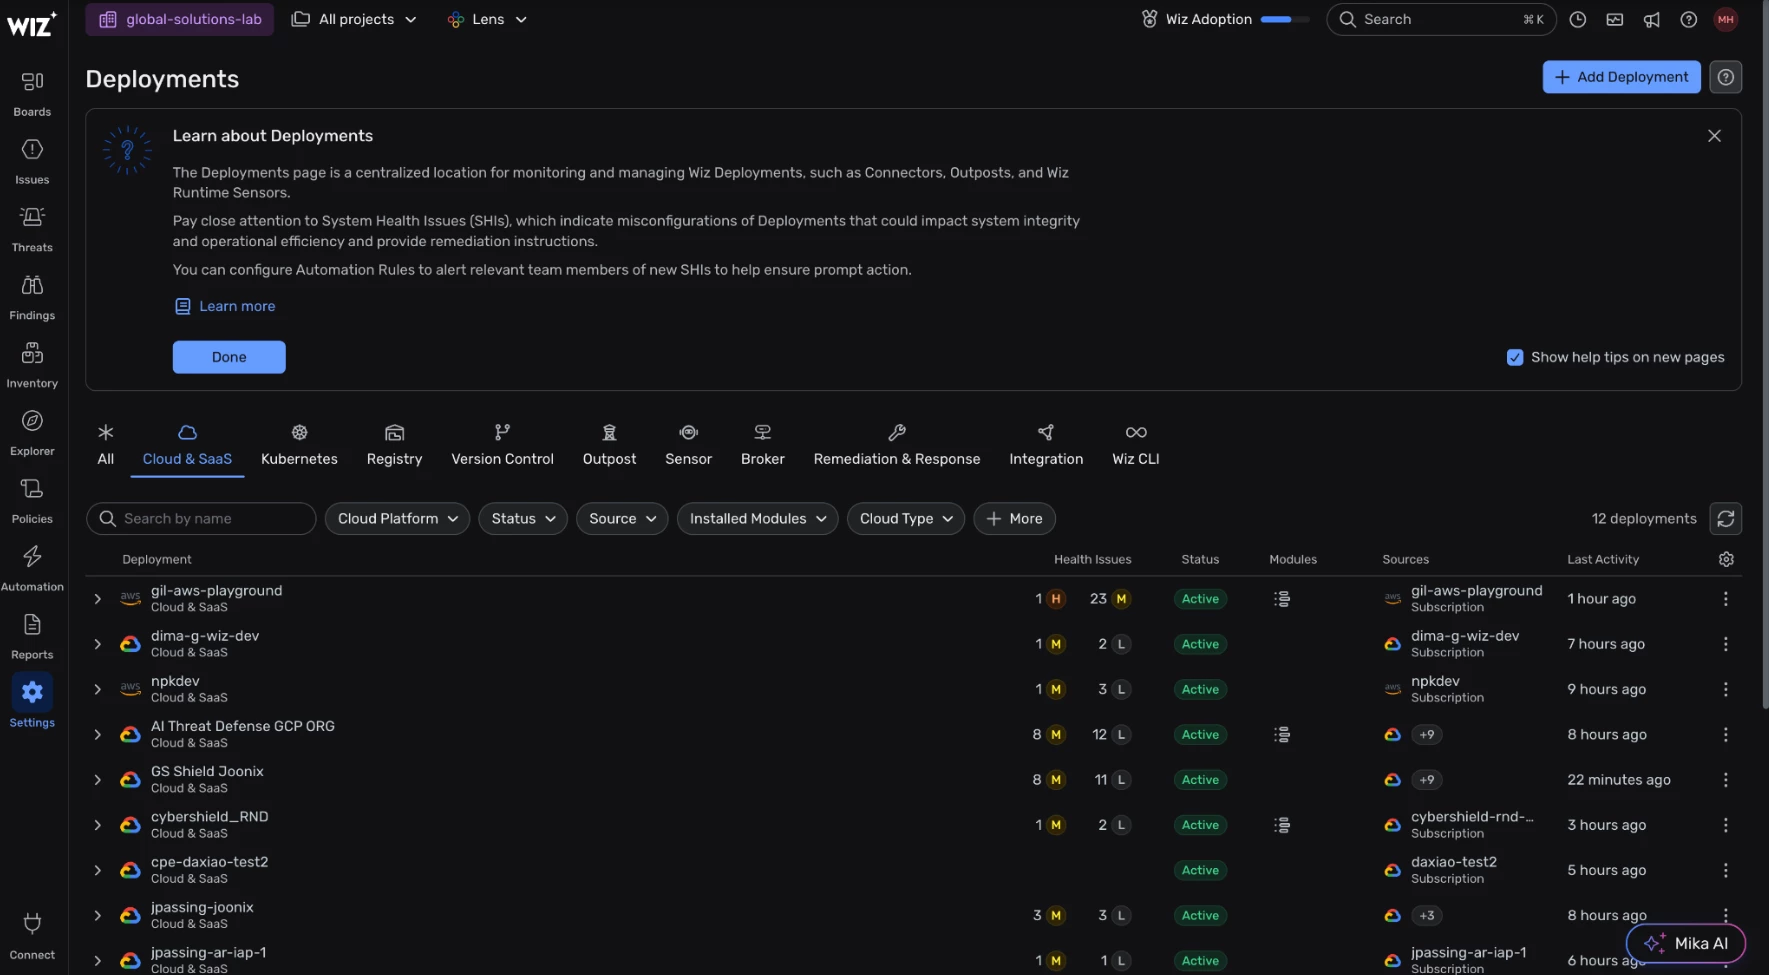
- Click Add Deployment
- Search for and click on Google SecOps (Chronicle).
- Enter a descriptive name for the integration (e.g., Google SecOps Production Ingestion).
- Select the appropriate Project Scope.
- Paste your Google SecOps Customer ID (copied in Step 1).
- Enter your Google SecOps instance endpoint address (ensure you use the standard Google SecOps Ingestion API endpoint for your region - you can get those here).
- Upload the Ingestion Authentication File (downloaded in Step 1).
- Click Save.
Step 3: Create a Workflow in Wiz
To actually send the data, you must tell Wiz what to send.
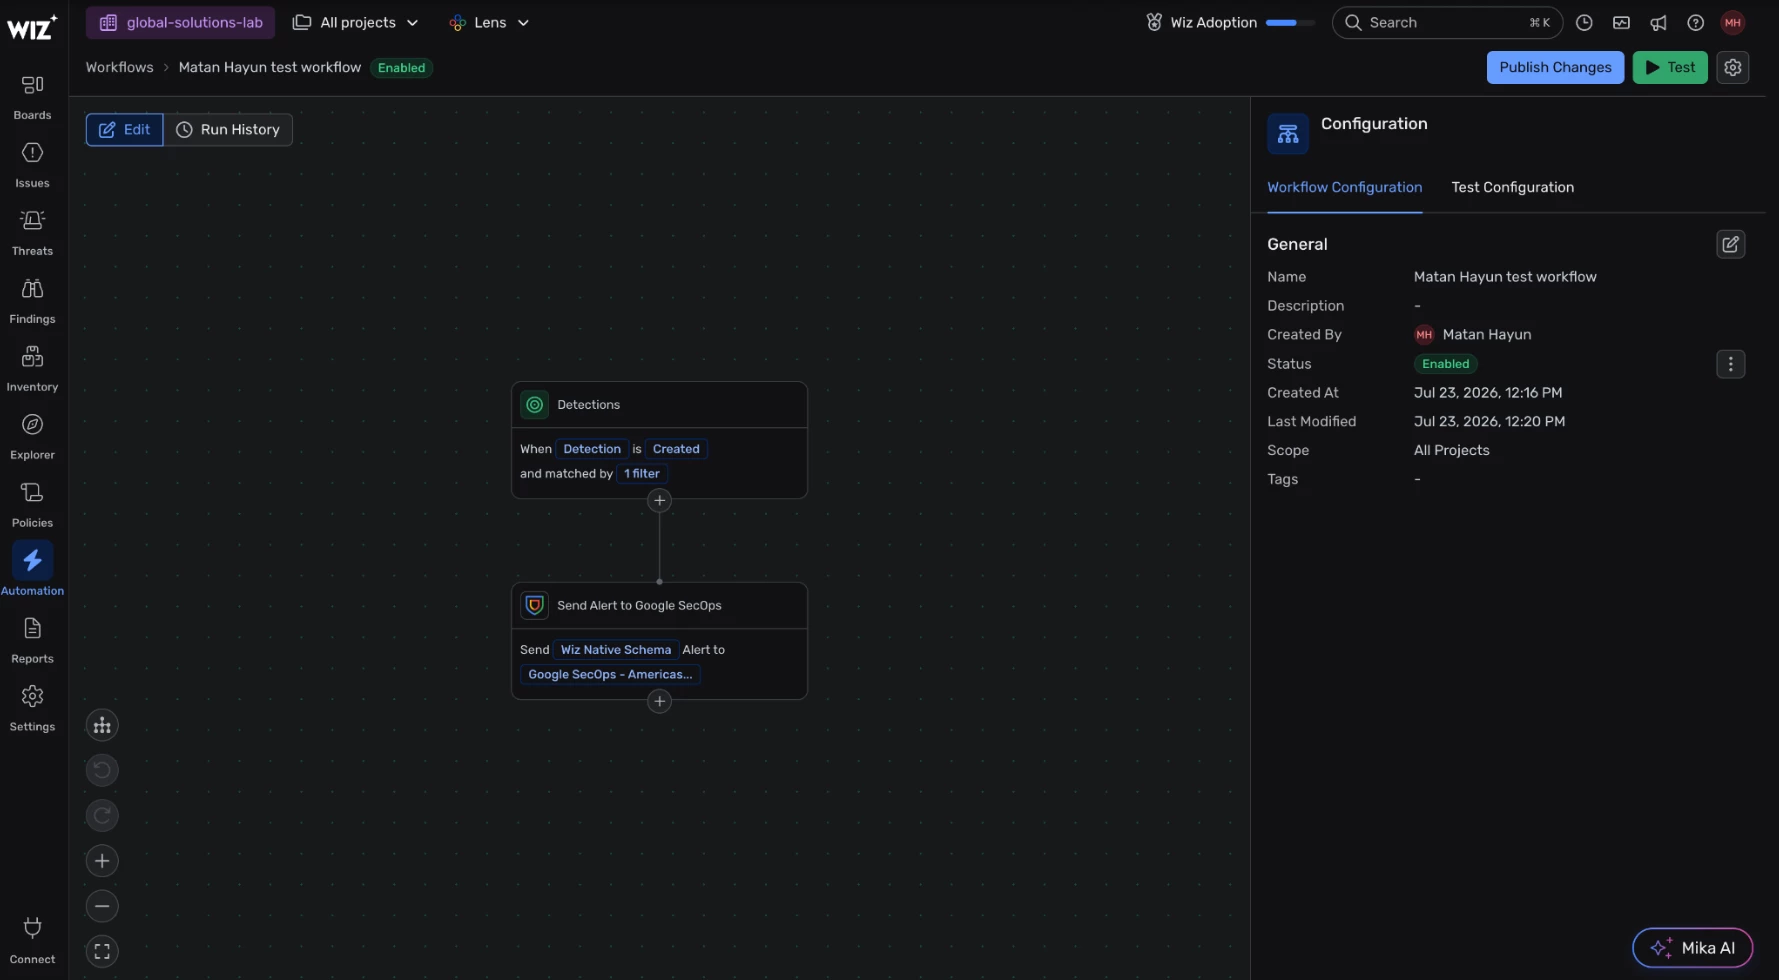
- In Wiz, go to Policies > Workflows and click Create Workflow.
- Select Detection when prompted to select a trigger
- In the configuration panel under Configuration, make sure the event type is Created. This tells the Workflow to trigger when a new Detection is created.
- Select at least one filter
- Add Send Alert to Google SecOps Step.
- Enter a Name (e.g., Send Detections to SecOps).
- Select the Google SecOps (Chronicle) integration you created in Step 2.
- Choose the Wiz Native Schema (recommended by Google).
- Select Detections trigger
- Click Create.
Step 4: Verify Data Flow
Once configured, generate a test alert in Wiz or wait for a live detection. Quickly check if data is flowing into SecOps by performing a UDM search.
- In Google SecOps, navigate to the Search interface.
- Run the following query:
metadata.log_type = "WIZ_IO"
metadata.product_event_type = "DETECTIONS" - Verify that recent events are returned in the search results.
Phase 2: Configure the Wiz Response Integration & Content Pack
With data flowing, you must ensure SecOps has the correct tools to parse, map, and interact
with the Wiz API.
For the official Google documentation on this step, please refer to the Wiz Marketplace
Integration Guide.
Step 1: Generate Wiz API Credentials
- In the Wiz platform, go to Settings > Access Management > Service Accounts.
- Click Add Service Account.
- Select the Custom Integration (GraphQL API) option.
- Ensure the account has the necessary scopes to read resources, issues, and reports. For the “Get Blue Agent Analysis” action, the specific permission required is “read:threat_issues”.
- Click Add. Crucial: Copy and securely store the Client ID and Client Secret, as the secret will not be displayed again.
Step 2: Update SecOps Connectors
- CRITICAL: Ensure your Google SecOps platform, specifically the “Google Chronicle” response integration and connector, is up to date.
- To properly ingest and map Wiz data, verify you are using version 90 or higher.
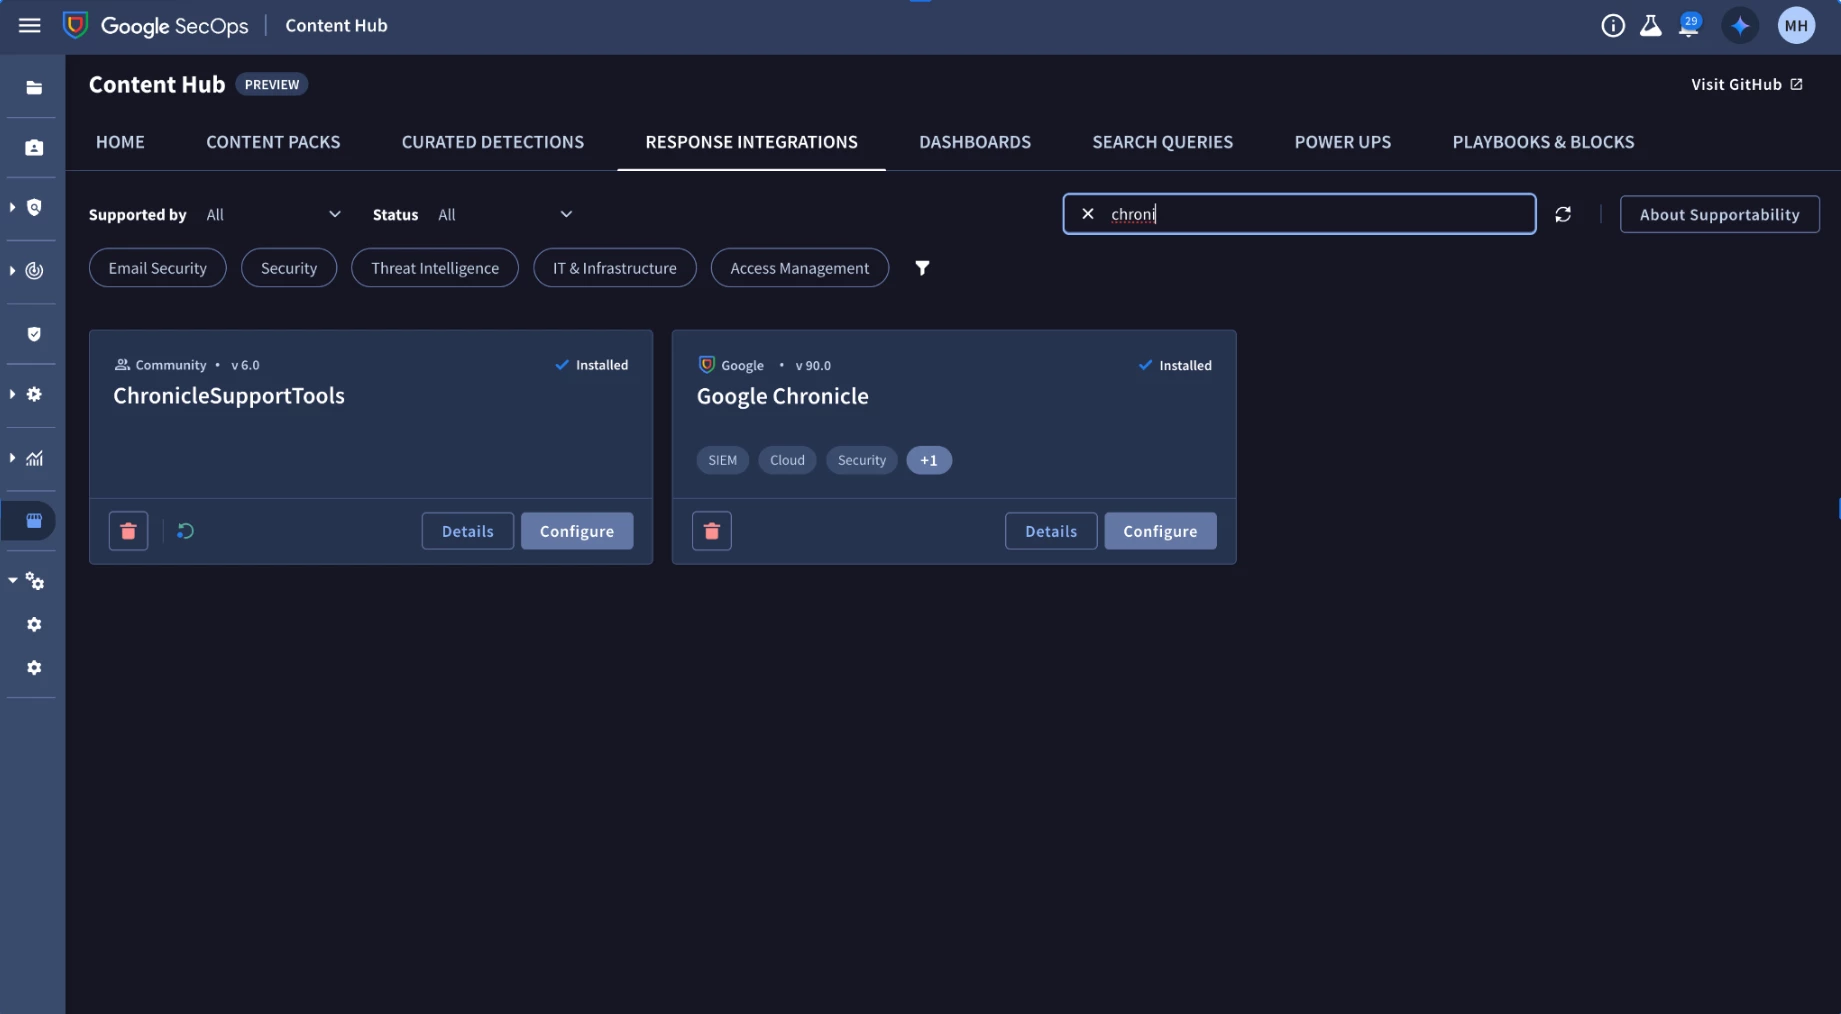
- We highly recommend updating the Out-of-the-Box (OOTB) mapping to ensure all new fields from Wiz are correctly parsed into the SecOps Unified Data Model (UDM).
Step 3: Configure the Wiz Response Integration in SecOps SOAR
- In Google SecOps, navigate to SOAR Settings > Integrations (or Marketplace).
- Search for and select the Wiz response integration.
- Configure the integration instance using the credentials generated in Step 1:
- API Root: URL of your Wiz instance API.
- Client ID: Paste the Client ID.
- Client Secret: Paste the Client Secret.
- Click Save and verify the connection.
Step 4: Install the Content Pack
- In Google SecOps, navigate to the Content Hub.
- Go to Content Packs.
- Search for the Wiz content pack.
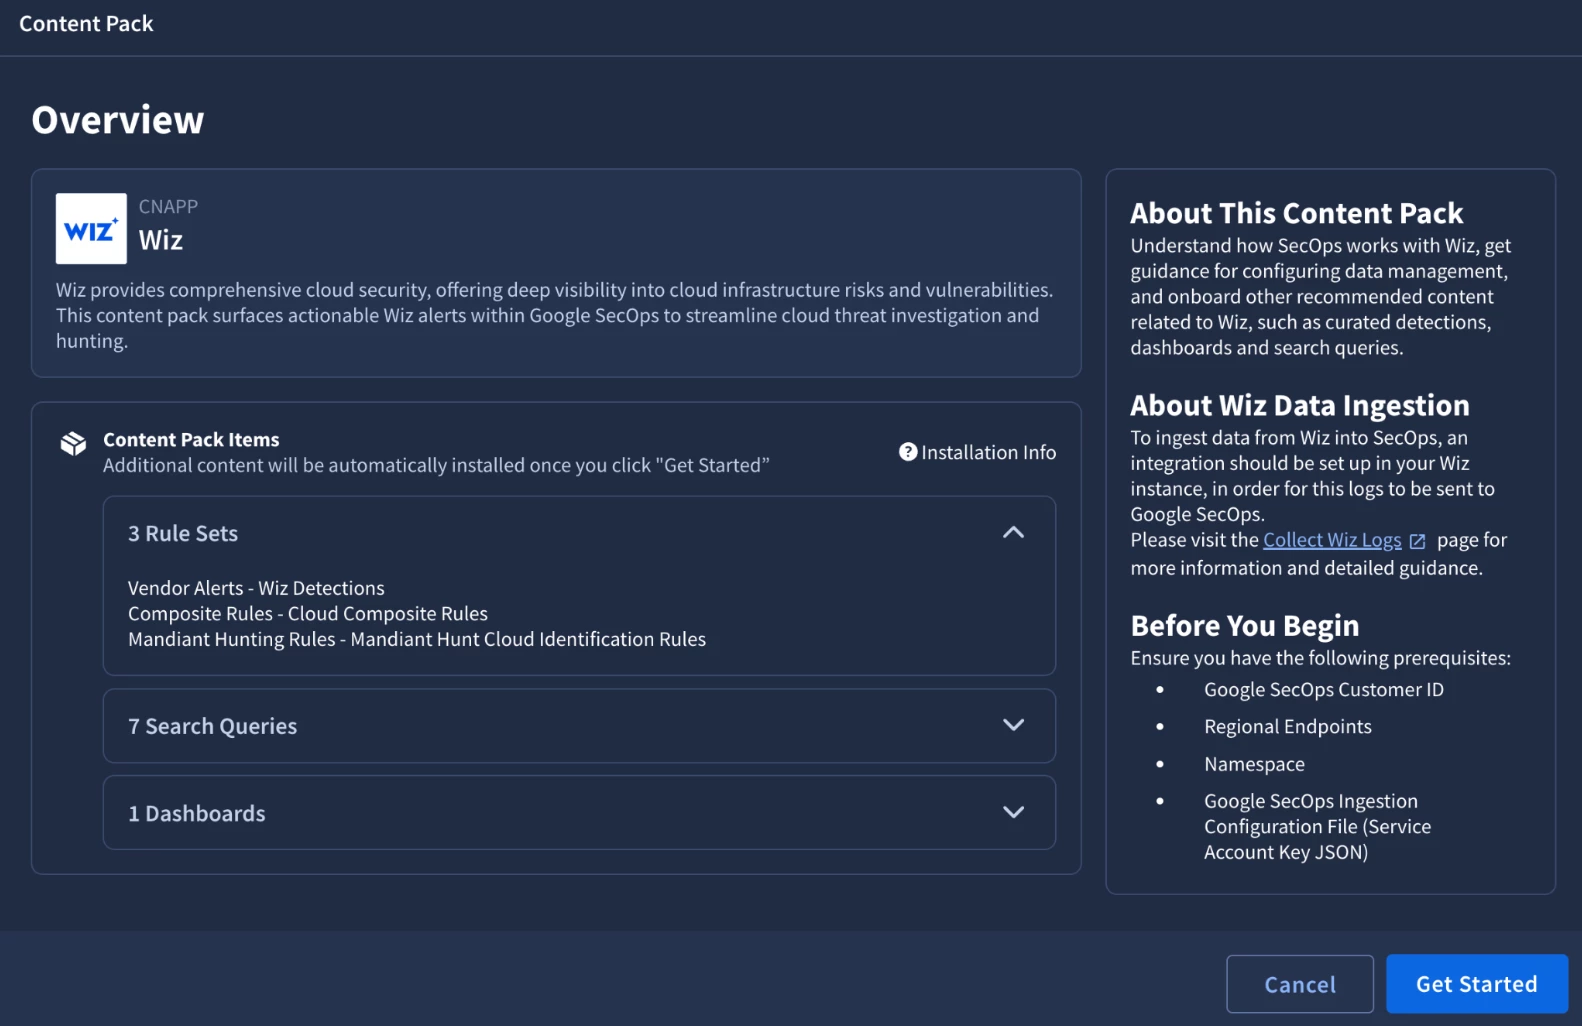
- Click Get Started
- When prompted regarding rules enablement, select "enable".
Phase 3: Create a Grouping Rule in SOAR
To prevent alert fatigue, configure SecOps to automatically group related Wiz detections into a single SOAR case.
Step 1: Navigate to Alert Grouping
- In the Google SecOps platform, go to Settings > SOAR > Settings > Advanced > Alerts Grouping.
Step 2: Create the Rule
- In the “rules” section, click the plus icon (+) to add a new grouping rule.
- In the Category dropdown, select Product.
- In the Product Name dropdown list, choose Wiz_Defend.
- In the Group by dropdown, choose Source Grouping Identifier. (Note: This ensures that alerts sharing the same underlying Wiz threat ID are clustered together).

- Click Create.
Step 3: Enable Cross-Source Grouping (Optional but Recommended)
If you want alerts from other security tools (like an EDR) to be grouped into the same case as
the Wiz detection (provided they share the same threat context):
- Stay on the Alerts Grouping page.
- Locate the toggle labeled “Group entities and source grouping identifiers in the same case”.
- Ensure this toggle is turned ON.

Phase 4: Configure the Blue Agent Analysis Playbook
The final step is to automate the retrieval of Wiz's deep, AI-driven context (Blue Agent Analysis)
for every new case.
Step 1: Create the Playbook
- In Google SecOps, go to Response > Playbooks.
- Click to create a new playbook.
- Set the trigger logic so the playbook runs at the Alert/Case level (e.g., triggered whenever a new case is created where the product is Wiz_Defend).
Step 2: Add the Blue Agent Analysis Action
- In the playbook builder, open the action/step selection panel.
- Search for the action named “Get Blue Agent Analysis” (this action is provided by the Wiz response integration configured in Phase 2).
- Drag the action onto the playbook canvas.
- Configure the action inputs to pass the relevant Issue ID or Alert ID from the triggering case to the action.
Step 3: Store the Results
- Add subsequent steps to the playbook to handle the output of the "Get Blue Agent Analysis" action.
- Configure these steps to store the returned values in an accessible place on the case. For example:
- Write the summary to the Case Wall as a comment.
- Update specific Custom Fields on the case with the findings.
- Attach the raw JSON analysis as a file to the case.
- Save and Enable the playbook.
Your integration is now complete! Wiz alerts will flow into SecOps, logically group together, and
automatically trigger deep contextual analysis.
Have questions about the integration steps? Or want to share your feedback with us? The product team is actively working and improving and wants to hear from you! Post your comments or questions below.


