


Today, Mandiant released a blog highlighting an expansion of ShinyHunters-branded extortion across multiple threat clusters. This activity isn’t associated with a specific vendor vulnerability, but rather is focused on social engineering. One group, UNC6661, impersonates IT staff and targets users to capture SSO credentials and MFA codes, and in some cases this actor has gained access to accounts belonging to Okta customers. I highly recommend reading the entire blog.
With that background I wanted to take this opportunity to highlight that in the blog, a set of IOCs are available including phishing domain lure patterns and network indicators, as well as a set of rules. This blog will highlight the Okta rule pack but can easily be applied to the Cloud Hacktools and Office 365 packs as well because Google Security Operations (SecOps) customers also have access to these.
What Are Curated Detections?
In case you aren’t familiar with curated detections, these are YARA-L rules that Google develops and maintains that can provide actionable insights against data that is ingested by Google SecOps. There are a number of different categories of curated detections, including Cloud Threats, which is the broad category that Okta falls into.
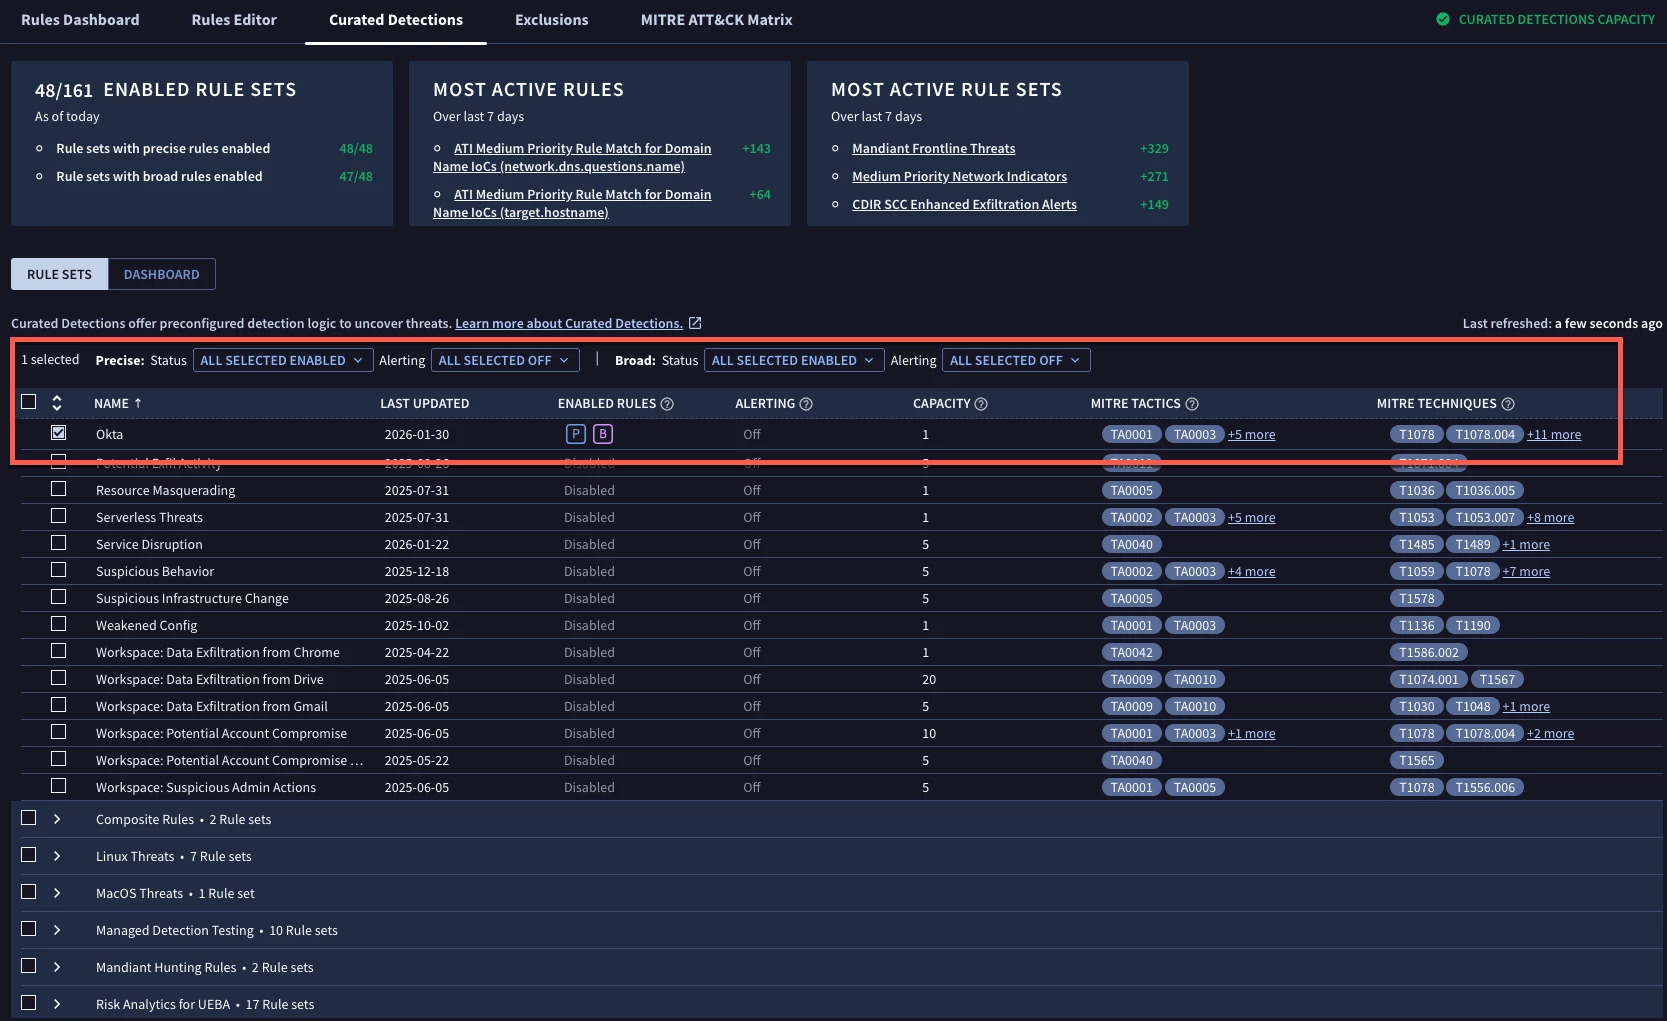
Here we can see a quick summary of the rule pack, its current state, when it was last updated as well as MITRE ATT&CK tactics and techniques the rules within the rule pack encompass.
Configuring a Rule Pack
If we click on the Okta rule pack, we are brought to a package specific view. In Settings, we can see rules are broken out into Precise and Broad classifications. To quickly activate this rule pack, I can toggle the Status for both of these to Enabled. Notice that in the Alerting column, the rules are not set to alert. Because I turned this pack on this morning, I don’t have any detections under the Most Active Rules Over the Last 30 Days.
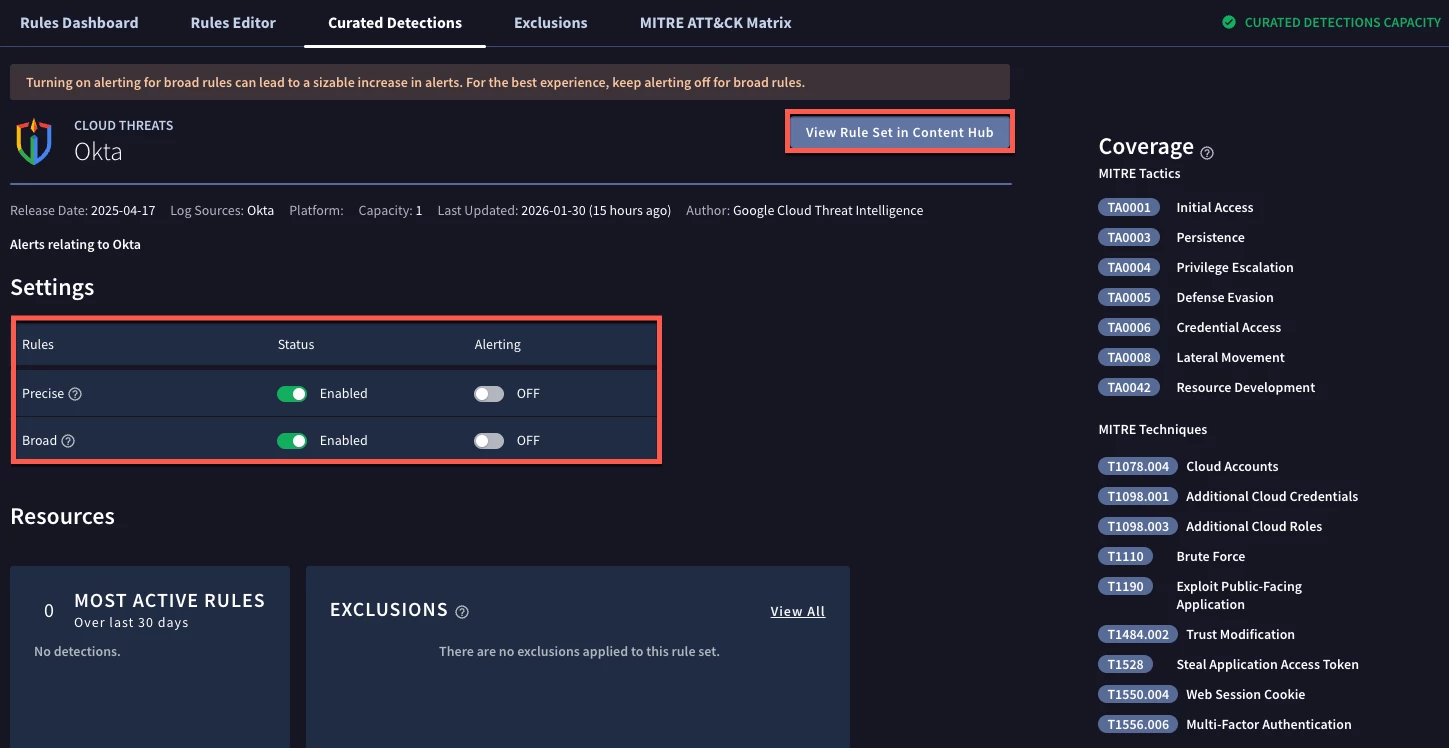
Regarding the alert toggle, I made a conscious choice not to turn it on because I don’t want to introduce these detections to my analysts as alerts until I have had a chance to validate them and potentially tune them. That’s my choice, you can certainly toggle Alerting to on immediately if you choose to do so. In fact, in a rapid response situation, that may be necessary. I only mention this because Google SecOps provides you the ability to take a measured approach rather than an all or nothing approach with the rule packs.
Viewing Rule Performance
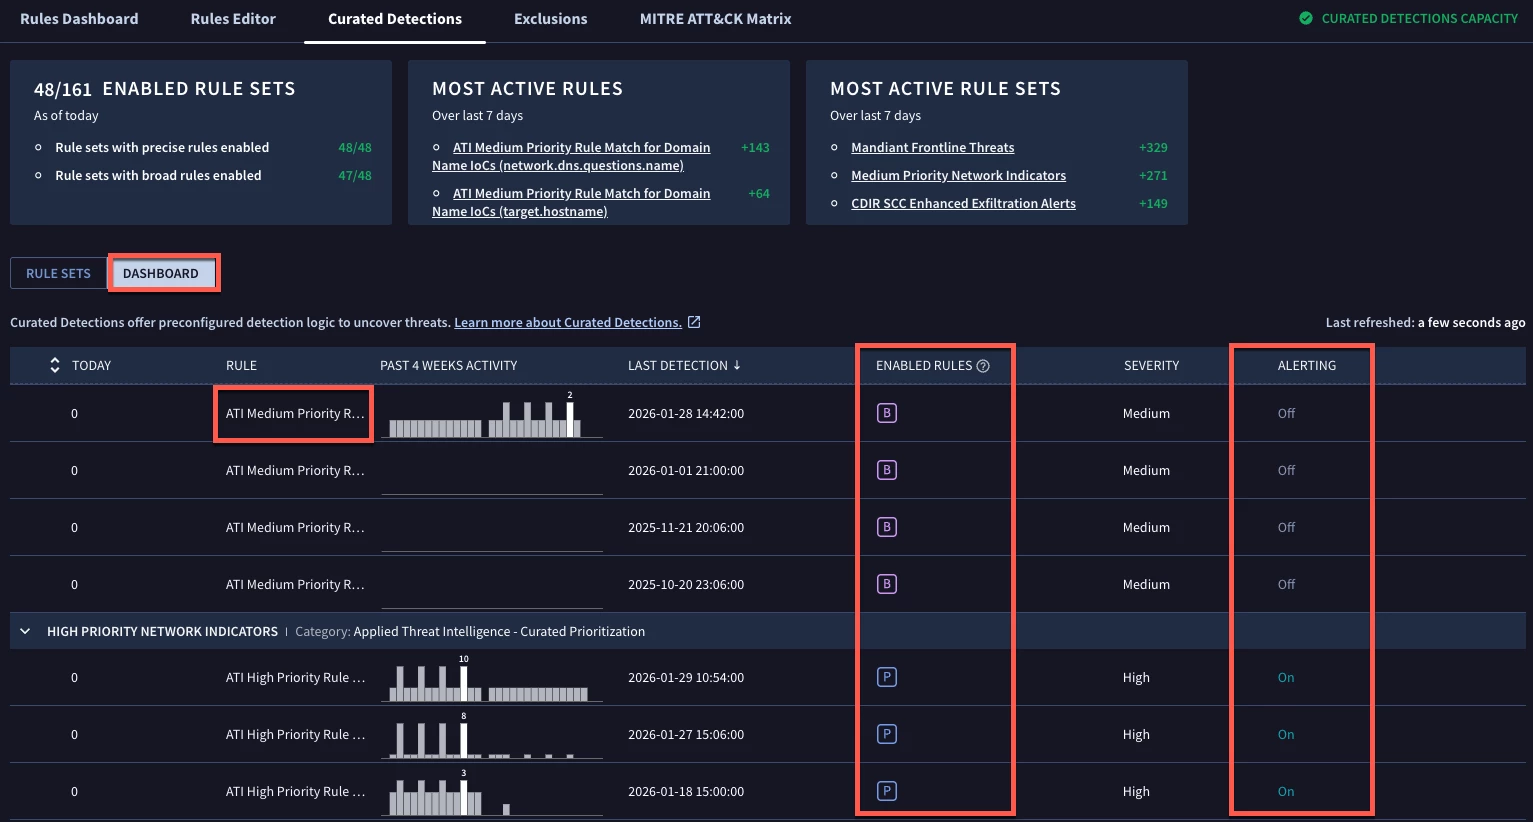
Any events being ingested that meet the criteria in the Okta rule pack will be detected and alerted upon, depending on how you set the toggles. If you want to view the rules that have generated detections or alerts, you can view them in the dashboard section of the Curated Detections sub-tab. Again, since I just turned on my Okta rule pack, none of them have detected anything yet. However, I do have both Medium and High Priority Network Indicators packs that have triggered multiple rules within each package. Notice how the medium priority rules are not set for alerting but the high priority rules are?
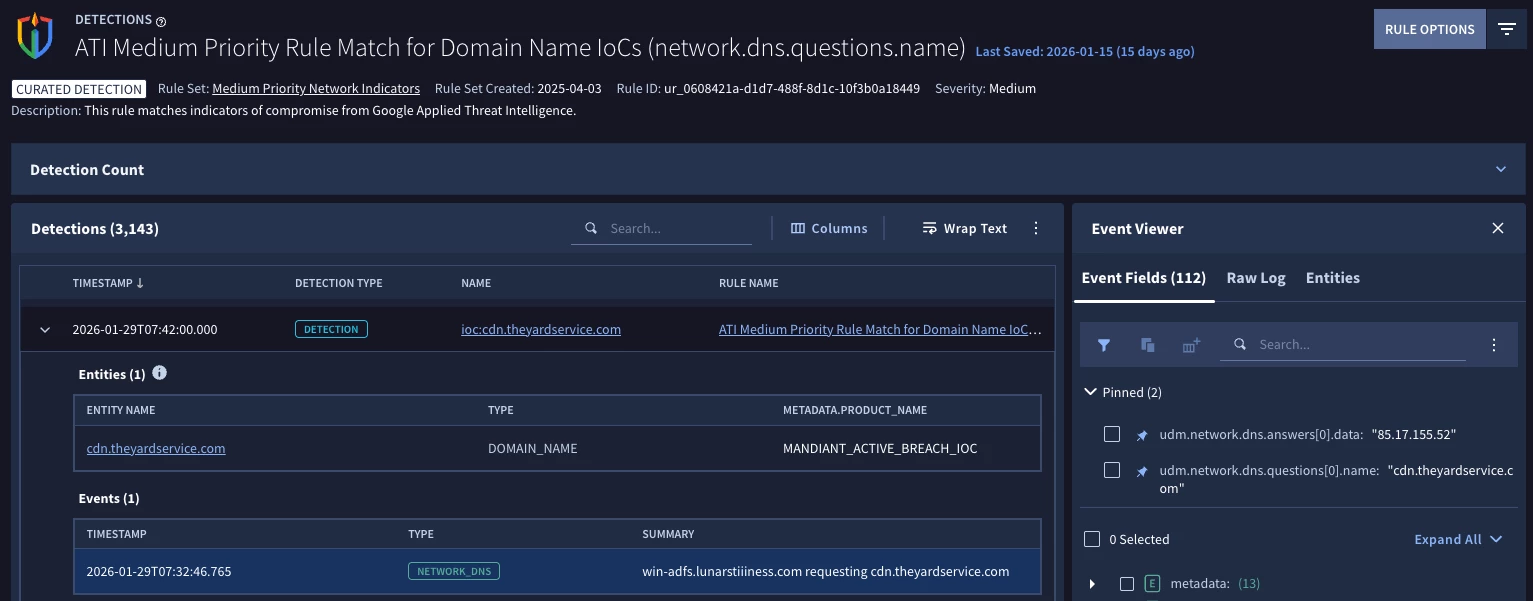
If I wanted to see the detections and alerts for each rule, I can click on the rule and get a view with the name of the rule at the top of the page and a listing of the detections. I can expand the detections, like the one here and see the associated events and entities, if applicable, and view the underlying UDM fields as well to better validate the detection.
Viewing Rules in Content Hub
Let’s circle back to the rules within the Okta rule pack. Within each rule pack configuration page, there is a button with the instructions View Rule Set in Content Hub. Clicking this will take you to the Content Hub and the Curated Detections sub-tab. Alternatively, you can navigate to the Content Hub yourself.
Within the Content Hub, there are integrations for playbooks, search queries and other content that you can leverage, but our focus today is the Okta rule pack. We just spent a few minutes deploying the entire rule pack, so let’s take a look at what that entails. Clicking on the funnel provides us the ability to filter by Okta to view cards for each of the rules within the pack. There are additional filter options around the Category and Precision. Also take note that each of the rule cards has a P or a B in the top right corner. These indicate if the rule is classified as Precise or Broad.
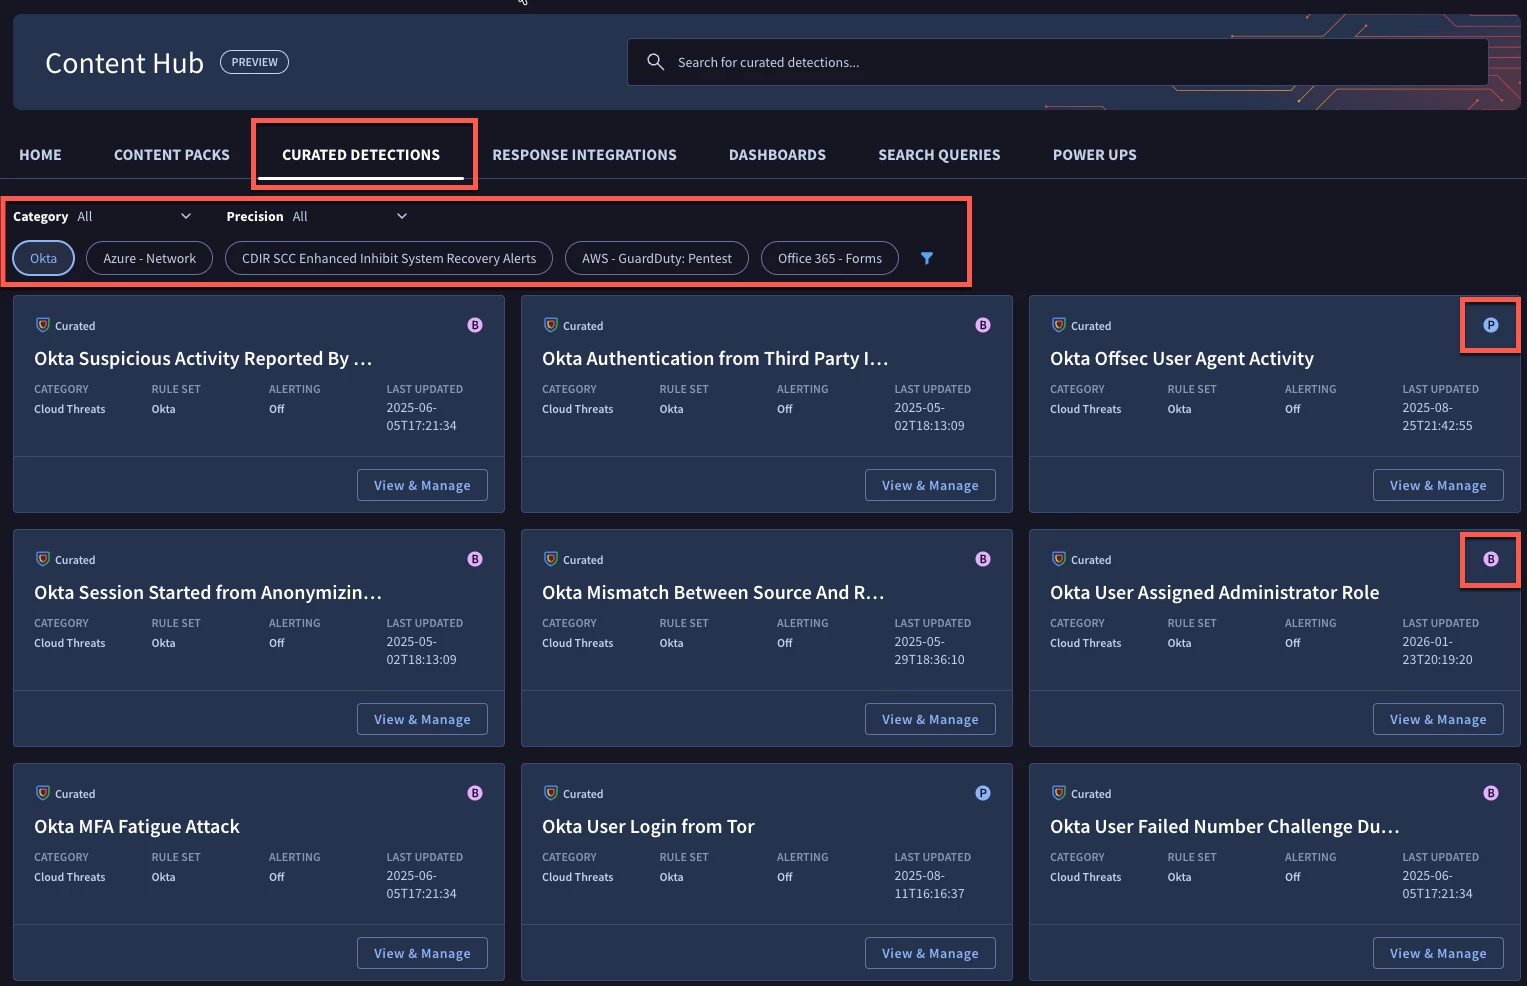
One of the rules that was referenced was named Okta Suspicious Actions from Anonymized IP. If we wanted to just view that rule, we could paste that rule name into the search bar and the results in the content hub will filter down to just the matches.

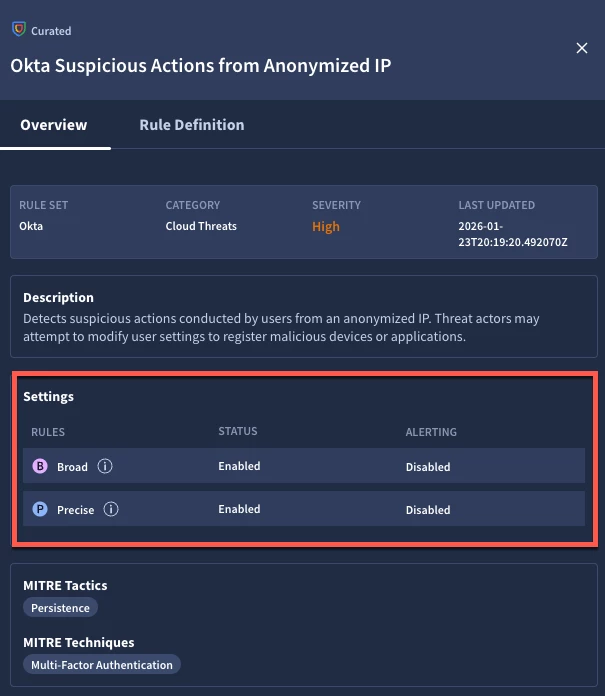
When we click on the View & Manage button on the rule card, a sliding drawer opens on the right side of the page with an overview of the rule. We can see that it is part of the Okta rule pack, (no surprise there), as well as the severity of the rule and when it was last updated. We can also see the settings for the rule pack as it pertains to my tenant. Again, I set the pack to be enabled for both rule types but disabled the alerting and that is reflected here as well.
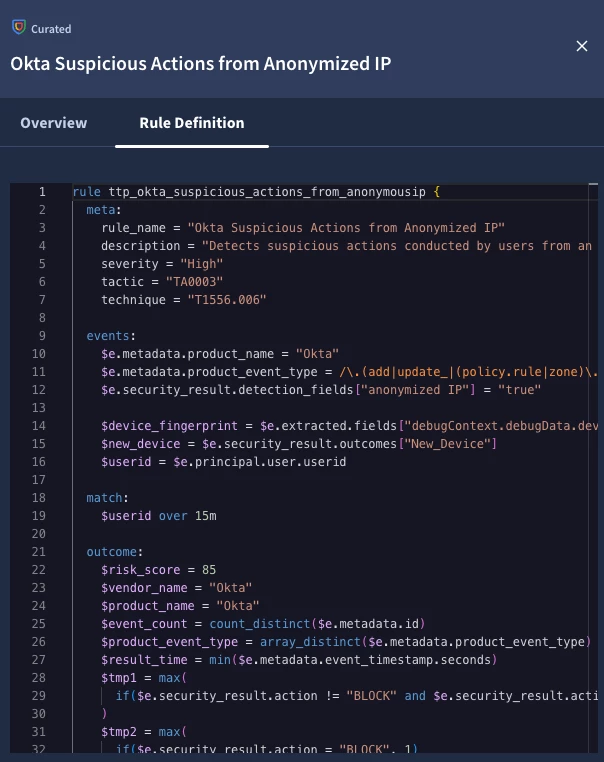
If I click on Rule Definition, I can see the underlying YARA-L logic for the rule itself. This can help my detection engineering team better understand how we arrived at this detection.
At this point, I can move forward knowing that I have coverage turned on for these Okta rules and can monitor them moving forward. However, I realize that there may be a desire to perform additional analysis or tuning, so let’s take a moment to discuss these options.
Tuning & Customization
Within the Rules & Detections section of Google SecOps, there is an Exclusions sub-tab. You have the option of setting exclusions on a per rule or rule pack basis. It’s important to note that to create a rule level exclusion that the rule must have been detected at least once before creating the exclusion. The exclusion statement uses conditional logic and we can test the exclusion before deploying it.
Another option is we could take a rule and copy and paste it into the rules editor and make it our own custom rule. I want to wrap a large caveat around this approach because you are leaving behind the curated detection package and striking out on your own with a custom rule you are now responsible for moving forward. However, using the example above, perhaps I really like the idea of identifying suspicious actions, but want to expand this beyond anonymized IP addresses. That might be a reason to fork this detection and build my own custom rule.
Conclusion
I hope this was helpful to take a recent threat bulletin and learn how we can apply curated detections that are referenced in these types of reports and quickly determine if they have been deployed and if not, how they can be activated to help provide additional layers of insight to your security team.
Here are a few things to remember:
- Curated detections can be toggled to detect, with the additional step of alerting if desired
- They are broken into two sub types, broad and precise for additional tuning
- Exclusions can be used to tune rules and packs, if needed
- Curated Rules can be viewed within the content hub
- If you copy and paste a curated rule into the rule editor, you are forking the rule and future updates to the rule will not be reflected in your custom rule
If you aren’t using curated detections as part of your detection strategy, you should definitely consider it. Don’t forget to leverage the tips we discussed to view their performance and tune them as needed!
For additional actionable hardening, logging, and detection recommendations to help protect against these threats, you can also check out Mandiant’s blog on proactive defense against ShinyHunters-branded cybercrime.
