


Table of Contents

Google SecOps lets you investigate many different aspects of the information stored in your Google SecOps account. SecOps Investigation lets you to examine the aggregated security information for your enterprise going back for months or longer. Use Google SecOps to search across all of the domains accessed within your enterprise.
Actions

SIEM Search
The SIEM Search function lets you find events and alerts within your Google SecOps instance. SIEM Search includes a variety of search options that help you to navigate through your data. You can search for individual events and groups of events tied to shared search terms.
- Users will navigate to the left-side Navigation Bar and then select Investigation, which will display a dropdown menu.
- Select SIEM Search to display the SIEM Search page.
- On the SIEM Search page, users will be able to see a Search Query bar at the top of the page. Users can enter questions in natural language form.
- Example: “Find Externally Shared Documents with Confidential in the Title.”
- Once a Query is entered, users will select Generate Query.

- The Query will appear in the Terminal box below Search Query, showing Field and Operator.
- At the main part of the page, users will see the following options:
- Your Search History
- Your Saved Searches
- Searches Shared With You
- Users will have the following options:
- Search History (Open Search Manager)
- UDM Lookup
- Lists
- Feedback on Generated Query
- Rewrite Query
- Case Sensitivity
- Date/ Time Range
- Run Search
- Search History (Open Search Manager)
- Once a Query has been generated, users will see three tabs in the main section of the page:
- Overview
- Events
- Alerts
- If there are results, a number value will appear next to each section tab.
- Overview tab results will show entity Overview data.
- Events tab results will show the following details:
- Trend Over Time
- Prevalence
- Filter Options
- Aggregations
- Grouped Fields
- UDM Fields
- Events
- Timestamp
- Event
- User
- Hostname
- Process Name
- Search Events
- To Search for Events, users will enter a query into the Search Events field and select Apply To Search and Run button.
- If an event is selected, users will see an Event Viewer to the right of the Event, consisting of:
- Entities
- UDM Fields
- Raw Log w/ option to Manage Parser.
- Under the Events Results section, users can download the Queried Events by selecting the Download as CSV button.
Relevant Documentation Links

SOAR Search
The SOAR Search page lets you find specific cases or entities indexed by Google SecOps SOAR. Google SecOps SOAR stores all case and entity information from cases, giving you the ability to retrieve information that may be relevant for what you are investigating.
Steps
- Users will navigate to the left-side Navigation Bar and then select Investigation, which will display a dropdown menu.
- Select SOAR Search to display the SOAR Search page.
- On the SOAR Search page, users will be able to see a Search Query bar at the top of the page.
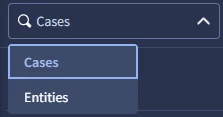
- To the left of the Search Query bar are two dropdown menus to filter between Cases and Entities, and a Date Range filter.
- On the left-side of the SOAR Search page, is a series of Filter options, each with a dropdown menu.
- The Cases Filter options consist of:
- Status
- Environments
- Tags
- Users
- Category Outcomes
- Ports
- Products
- Case Source
- Case Stages
- Alert Types
- Priorities
- Importance
- Is Incident
- The Entities Filter options consist of:
- Networks (Top 20)
- Environments (Top 20)
- Type
- Is Suspicious
- Is Internal Asset
- Is Enriched
- Results for both will appear in the main section of both pages.
Relevant Documentation Links
Next Step: Security Operations: Step 4.2 - Investigate | Investigate Cases & Alerts
Previous Step: Security Operations: Step 4 - Investigate