

Hey folks,
We just released the version 1 of Sample Integration. The purpose of this integration is to provide examples and guidance on how to build custom integrations. In this community post, I will do an overview of everything this integration has to offer.
Sample Integration contains the most common design patterns for all supported response integration content - actions, connector, jobs. You will have examples of how to handle different parameter types, how to build async actions, how to add enrichment information onto entities and a lot more! You can easily copy the code provided in the integration and then tweak it to your personal needs.
Additionally, it’s accessible through our Github, so you can fork it and use it in your local environment for development purposes (mp tool allows you to push code from local repository into a SecOps instance, but that’s a guide for a different day).
Integration Configuration
At the core of this integration, we selected an API that does currency conversions. Yes, it’s not cybersecurity related, but at the end of the day, it’s not a problem, because the end goal is to understand, the general ideas of how to build an integration. This API doesn’t require any setup, so you can try the integration immediately.
Still, to demonstrate how the common integration configuration will look like, there are 2 parameters that you can configure - API Root, Password Field, Verify SSL.
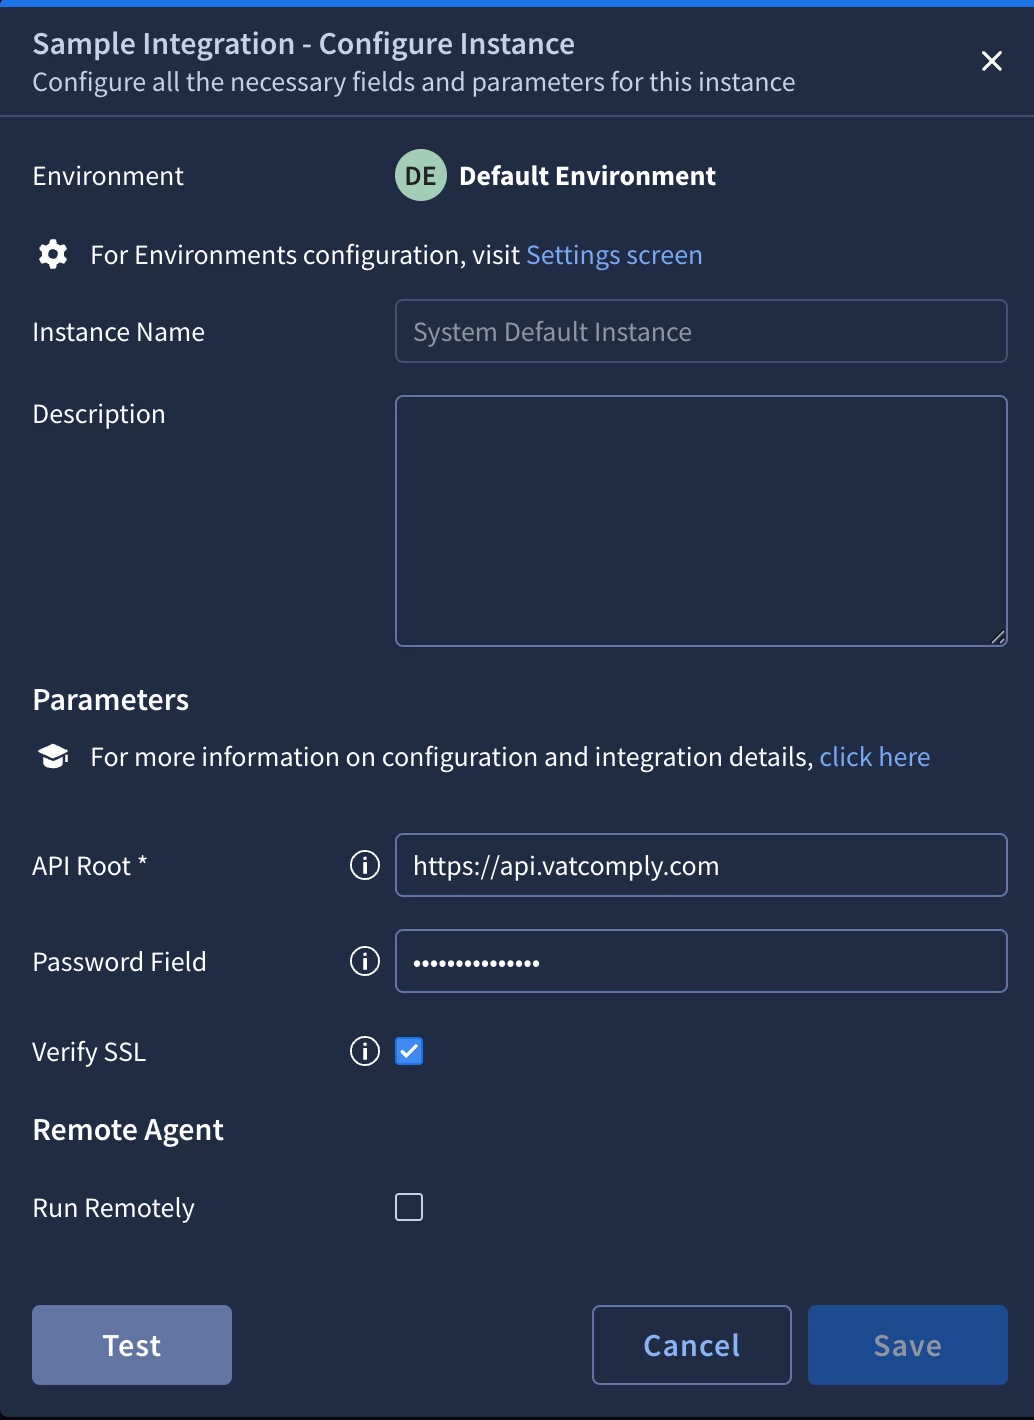
The “Password Field” doesn’t really have any impact on the execution of API, but it’s added, so that you can, how to handle “Secret” type of input parameter.
The “Verify SSL” parameter is the parameter that we put on every new integration. It ensures that the connectivity is secure. Overall, as we are communicating with a cloud service, it wasn’t necessary, but it’s considered as best practice to have it and we don’t allow any new integration to be contributed with this parameter.
Ping
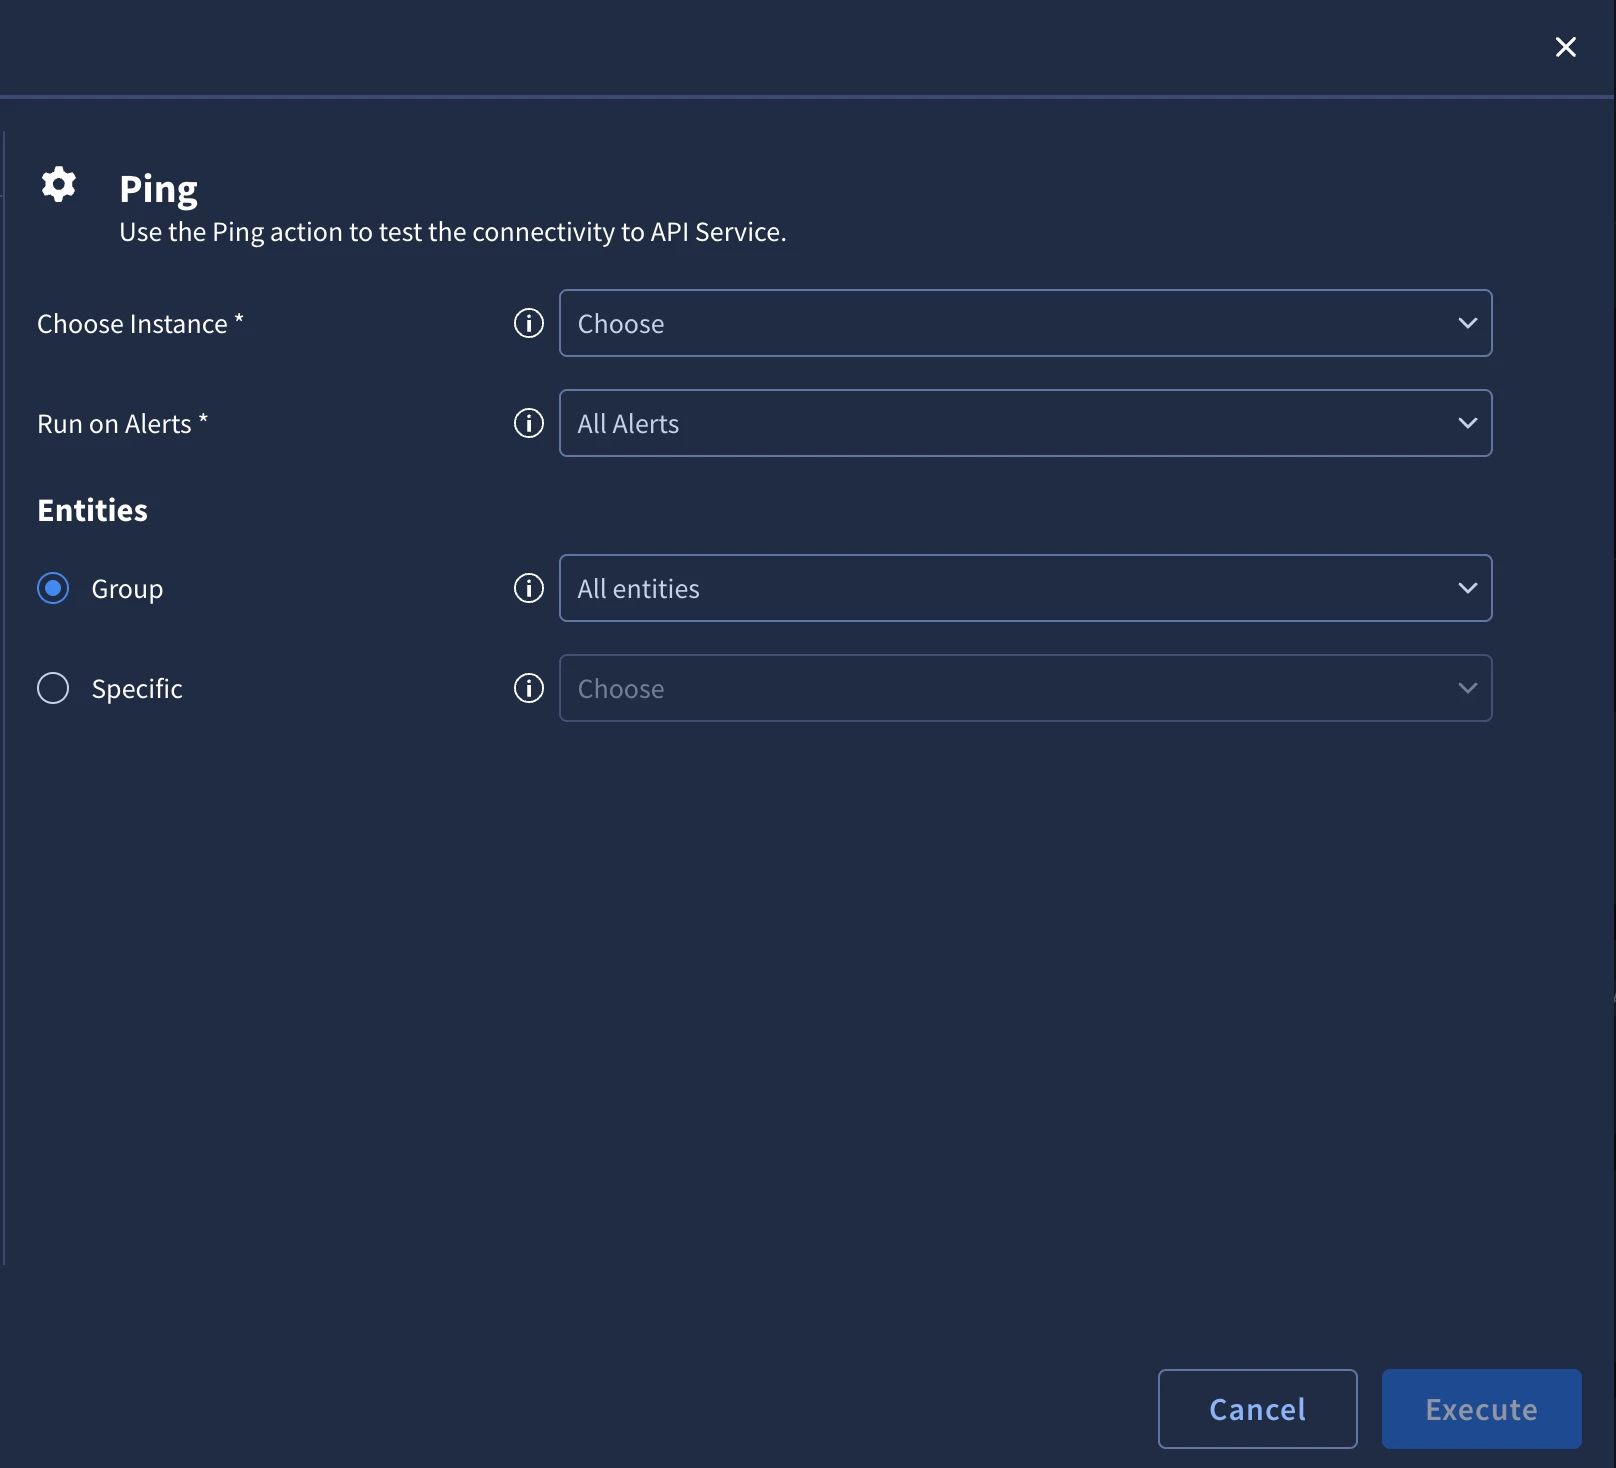
The Ping action is what is used by our platform, when you press on the “Test” button. The best practice is considered to have a lightweight API request.
Ping action shouldn’t have any parameters and it should only rely on integration configuration to work. You would see that because of that, the API request that is used in this action is basically hardcoded. The same practice is used in the commercial integrations.
Simple Action Example
As the name suggest, this action defines how a typical action looks like.
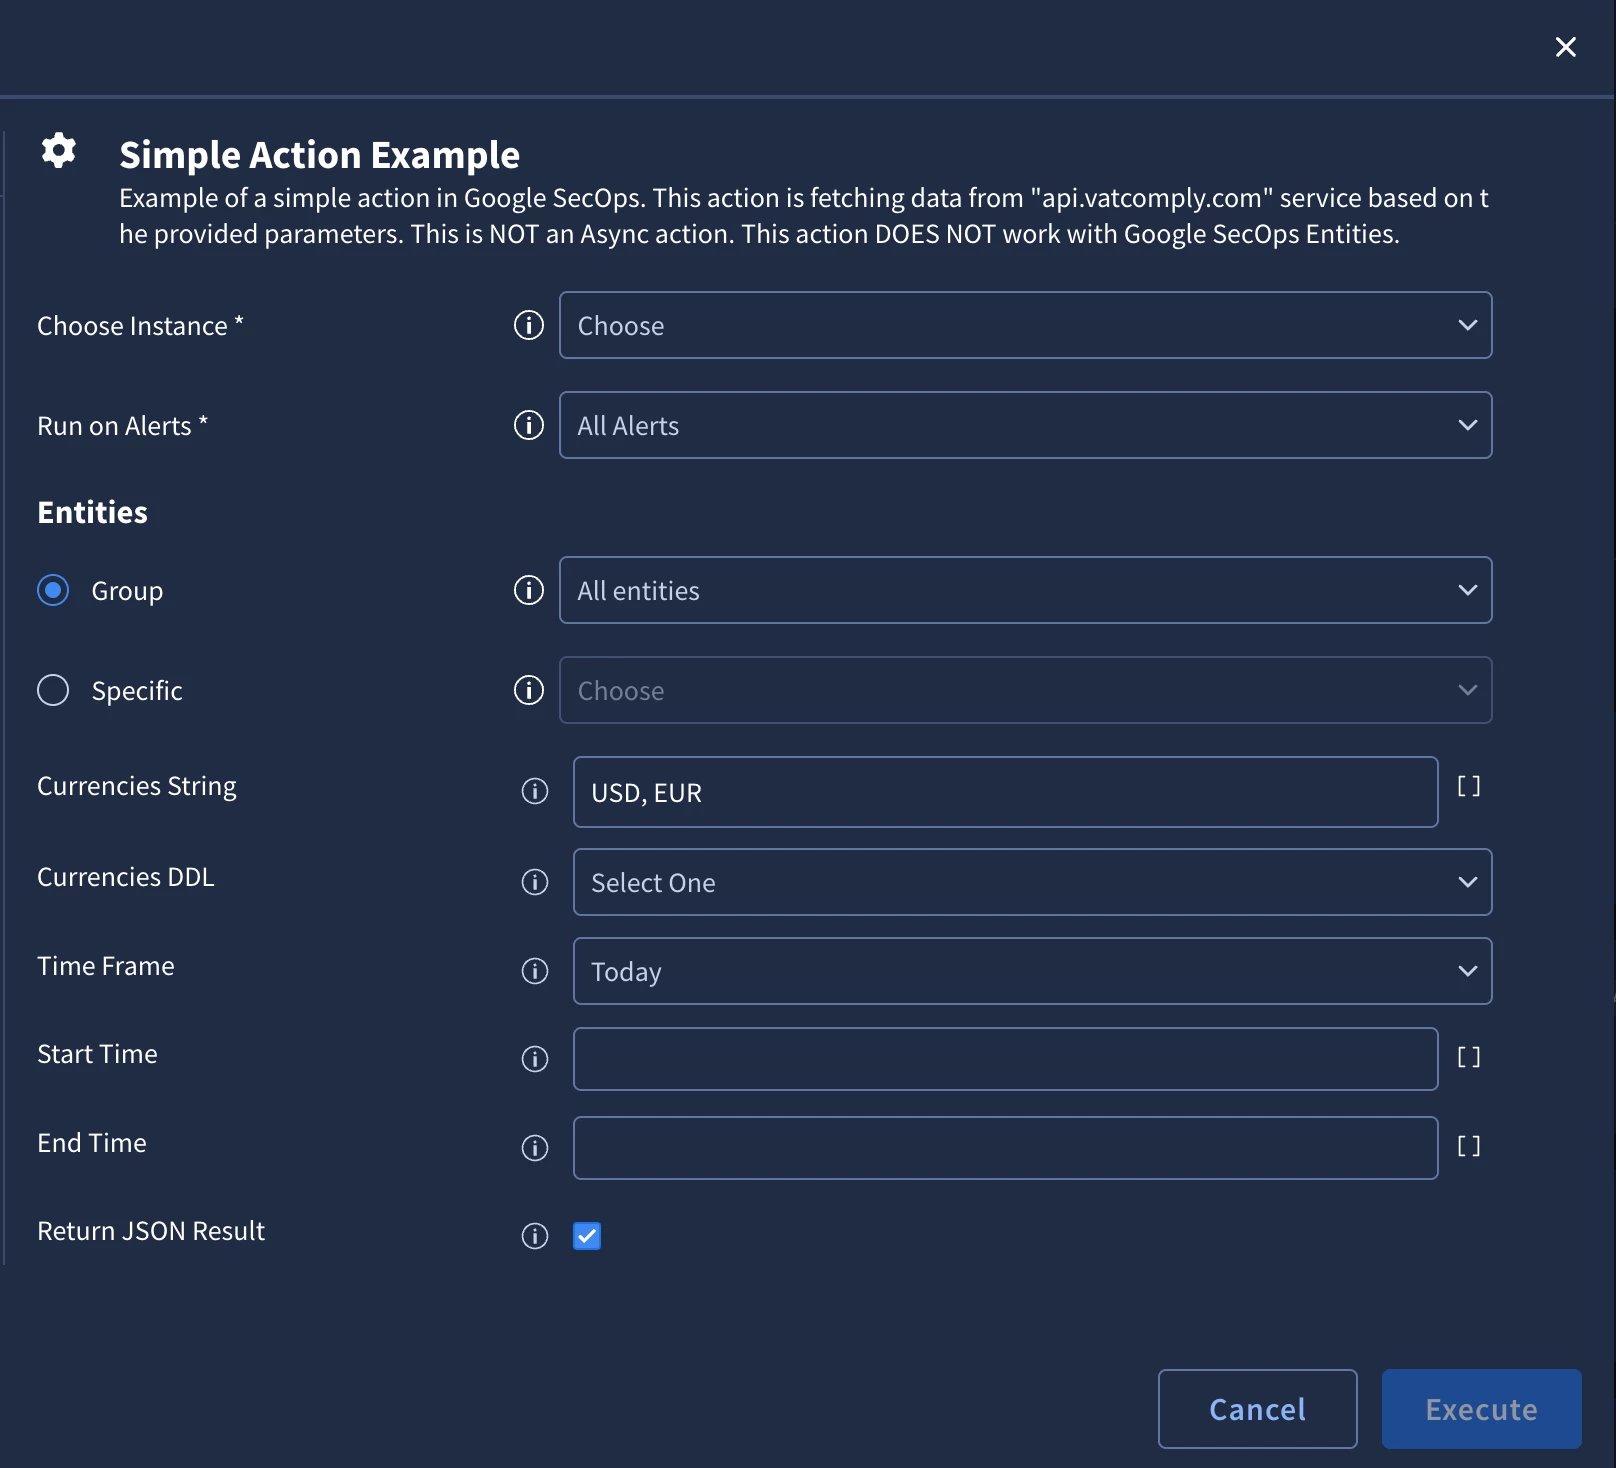
It features the following input parameters:
- String
- CSV (String type that has handling for comma-separated values)
- DDL
- Boolean
Additionally, it show you the most common way of how “Time” parameters are handled across Response Integrations, so you can take this implementation and copy for your own custom code.
It’s important to note that this action is not ASYNC and doesn’t work with Entities.
In terms of action outputs it features:
- Script Result
- JSON Result (optionally enabled via “Return JSON Result” parameter)
- Case Wall Table
- Case Wall Attachment
- Case Wall Link
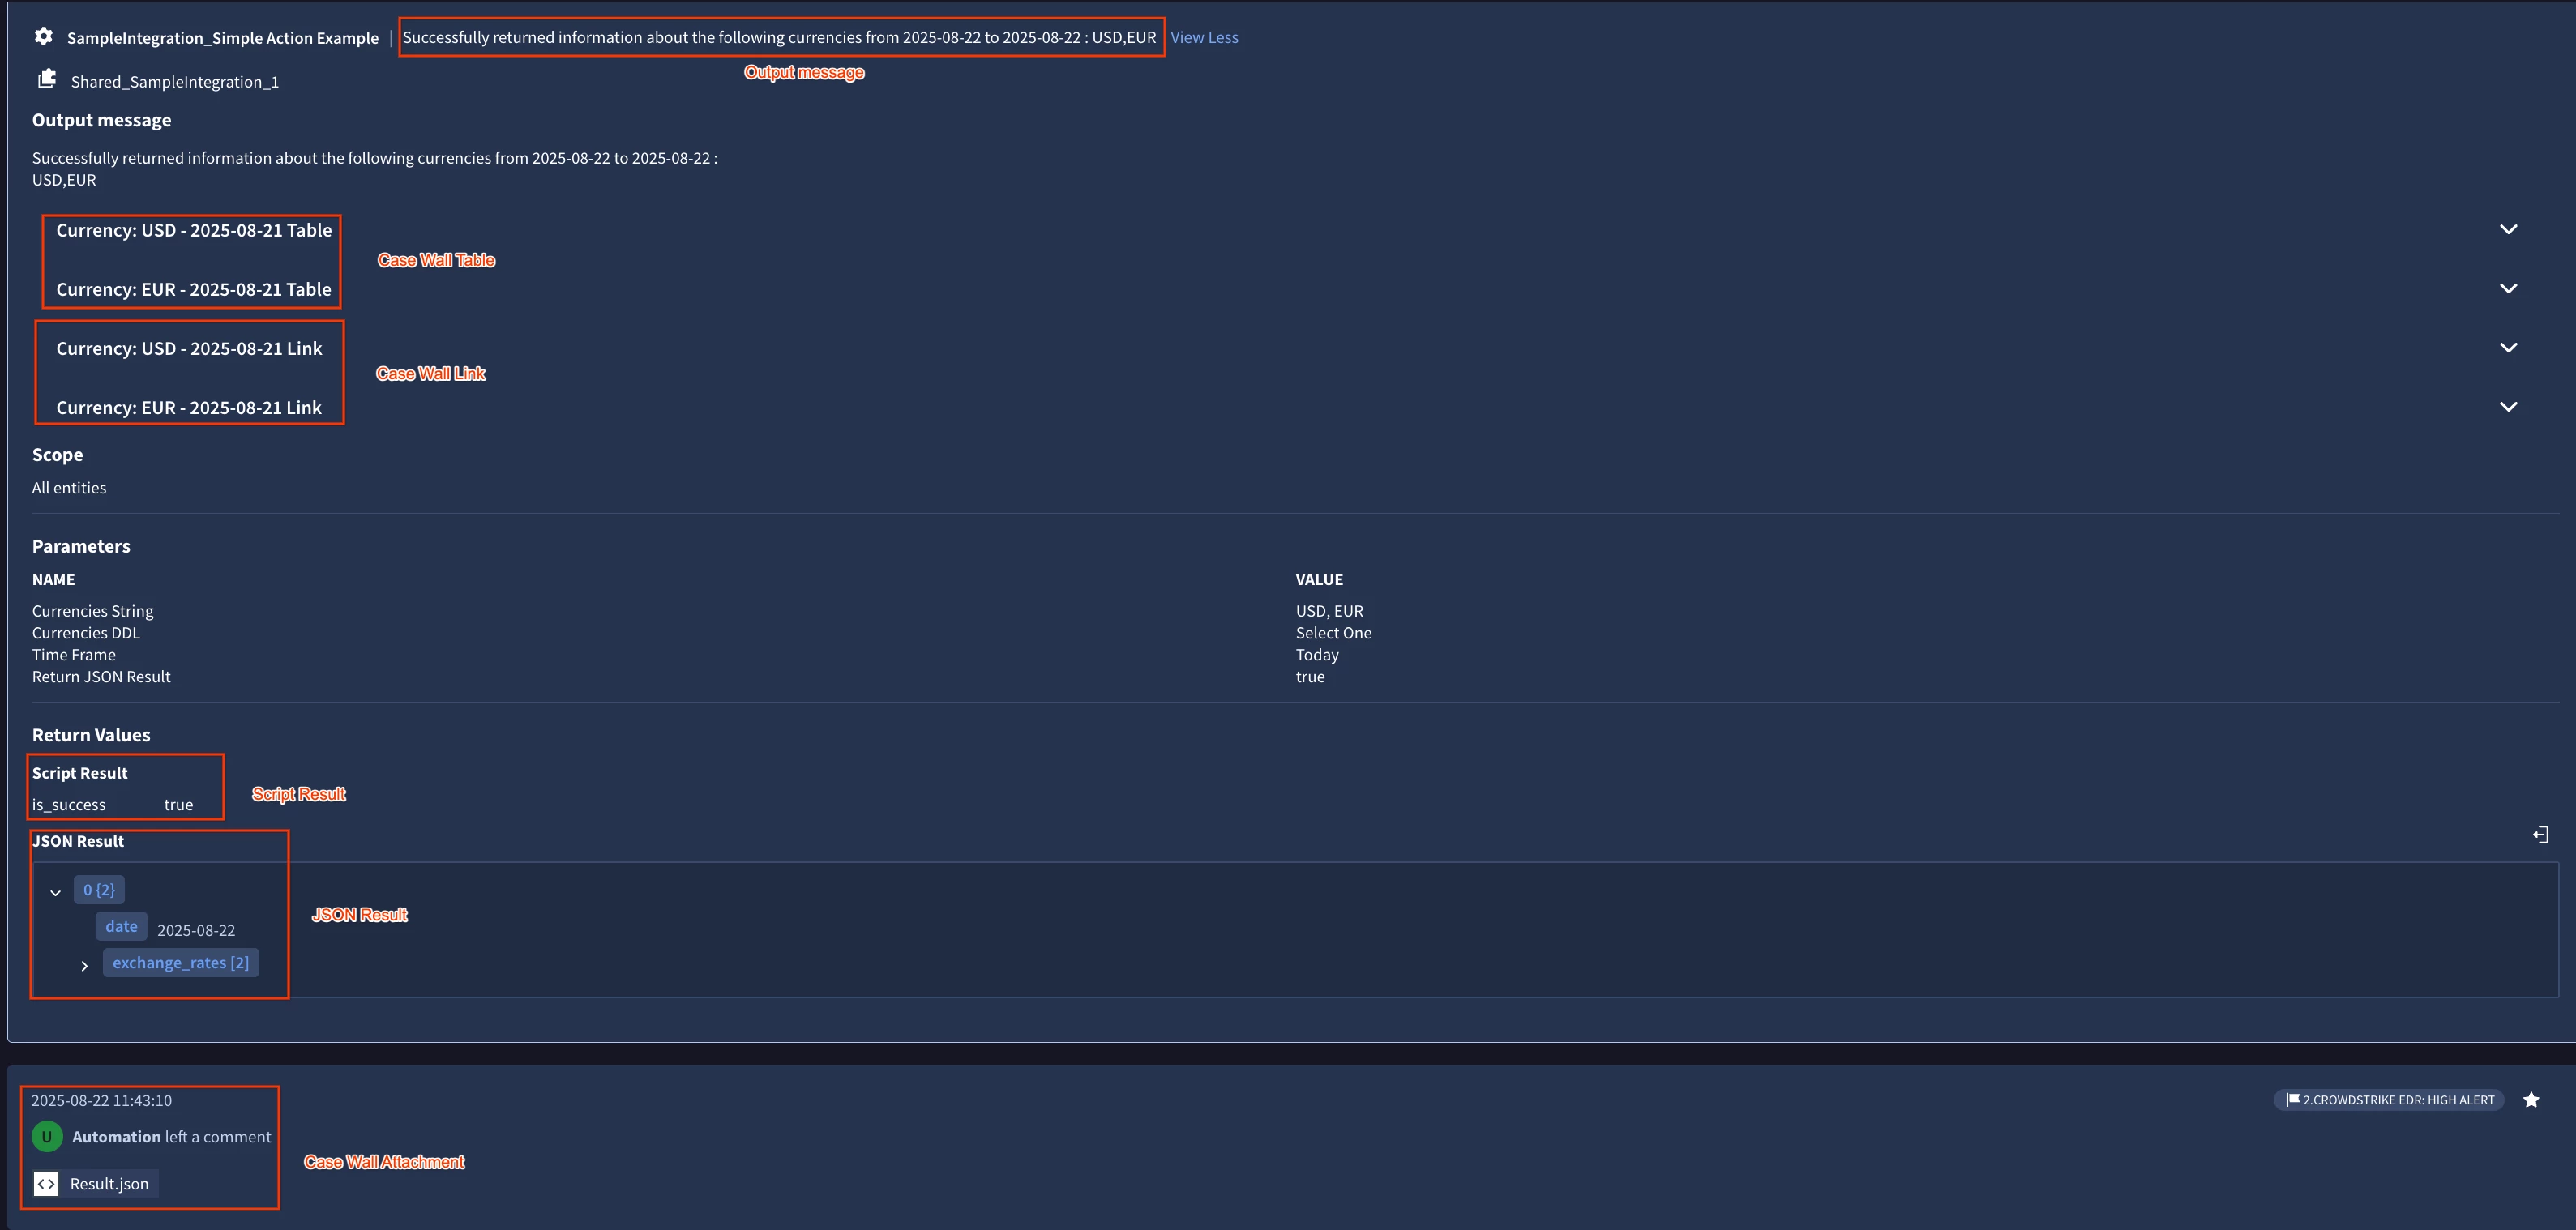
The output messages will follow the typical structure of the output messages that you see in the commercial Response Integrations. Same goes for Error Handling.
Enrich Entity Action Example
This action is designed to show you, how to work with Entities. Any action that involves IOCs or Assets will most likely work on Entities instead of input parameters to make the End-to-End experience more seamless. This action is also not Async.
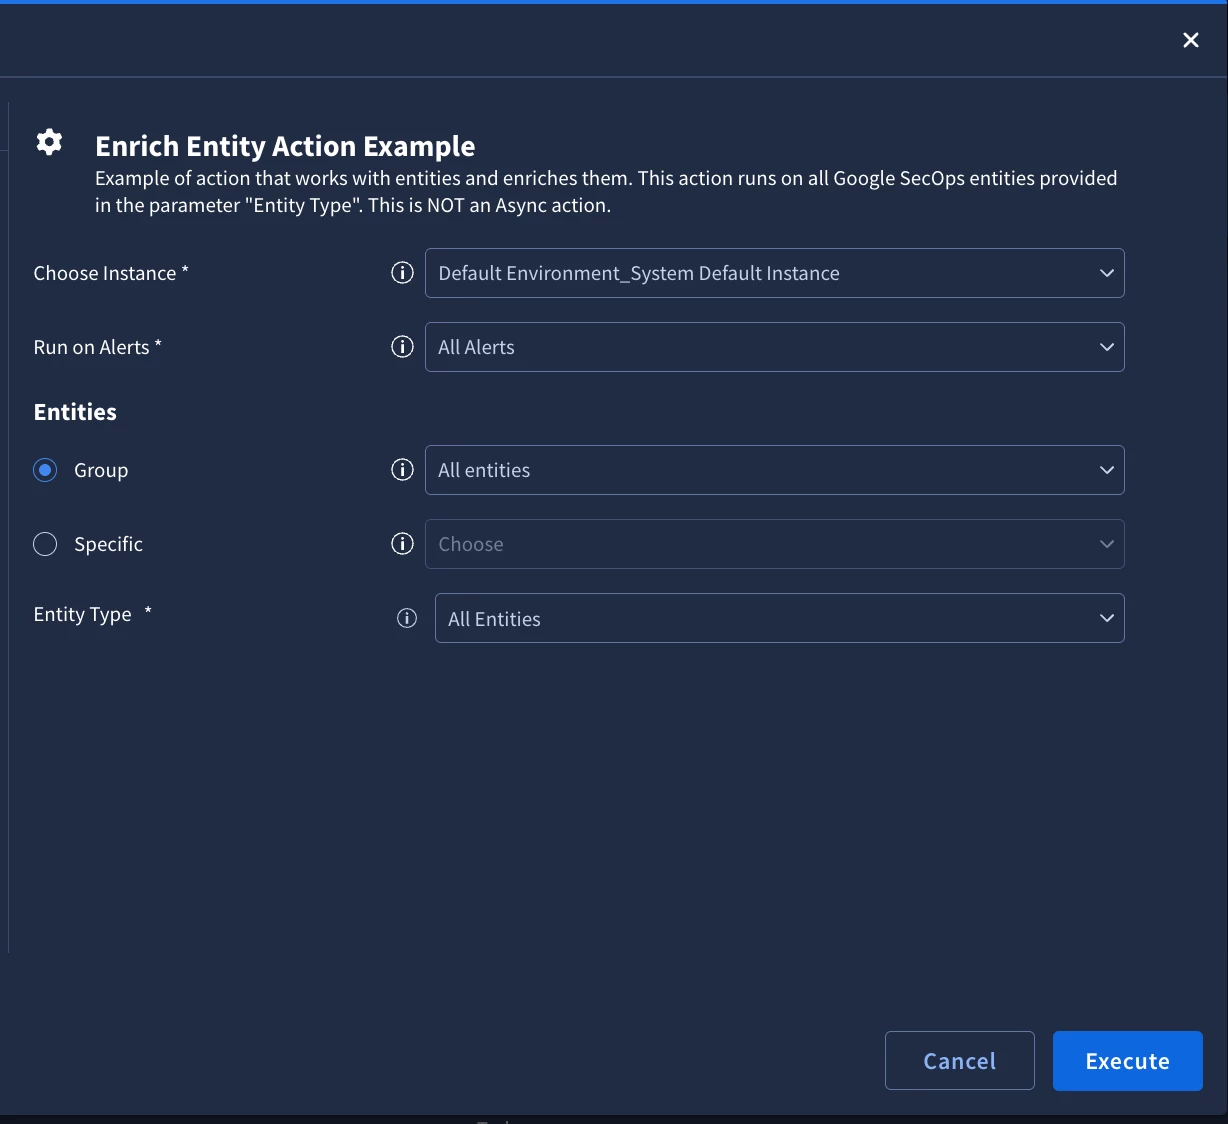
As part of the “Entity Type” parameter, you can control, if all entities will be taken from the scope or only a specific subset. It’s a pretty rare situation, where the action will work on all entity types, but to give you different scenarios, it’s supported via this example.
As part of this action, we are also updating the properties of the entities on which this was executed. It’s very useful, whenever we are trying to enrich entities with additional information. After the action execution you will see that there are two additional keys added to the metadata:
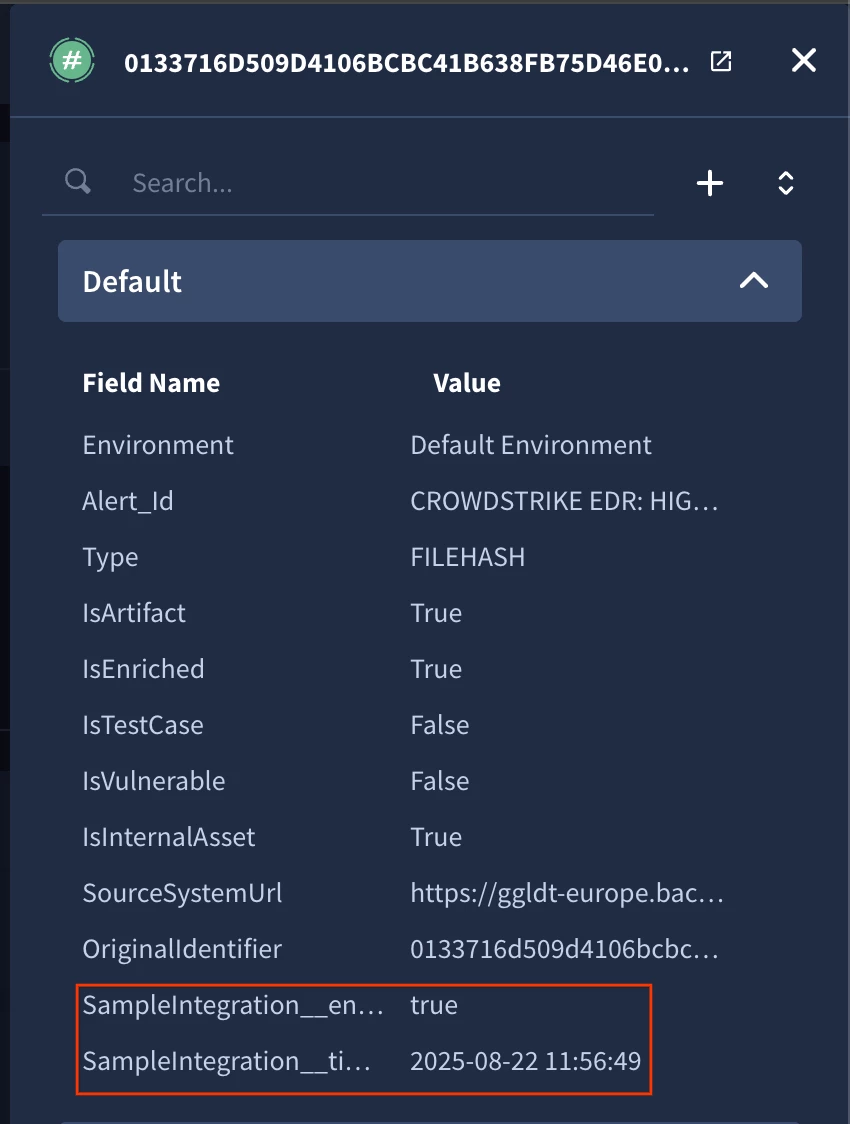
Additionally, it’s important to highlight the structure of the JSON Result. It’s designed specifically like this, so that it’s easier to work in playbooks + you can leverage Predefined widgets using it. Whenever we are iterating over some objects and return metadata about them, then this JSON Result structure is recommended, even if the action didn’t run on entities.
[
 {
 "Entity": "bd0b2aa853dfd355147bfd6e71194d25d84fa1c67fa161b4ac0a35a7ac98b092",
 "EntityResult": {
 "enriched": "true",
 "timestamp": " [removed by moderator] "
 }
 },
 {
 "Entity": "0133716d509d4106bcbc41b638fb75d46e0f651ff6a876fa34b68efffe06f9a1",
 "EntityResult": {
 "enriched": "true",
 "timestamp": " [removed by moderator] "
 }
 }
]
Async Action Example
The purpose of this action is to showcase, how to do an Async flow. As a refresher, the Async flow is needed, when you are starting some operation and waiting for the operation to finish before you can fetch results. The most typical example is when you are execute a search and you need to wait until search job will finish processing and you can fetch results.
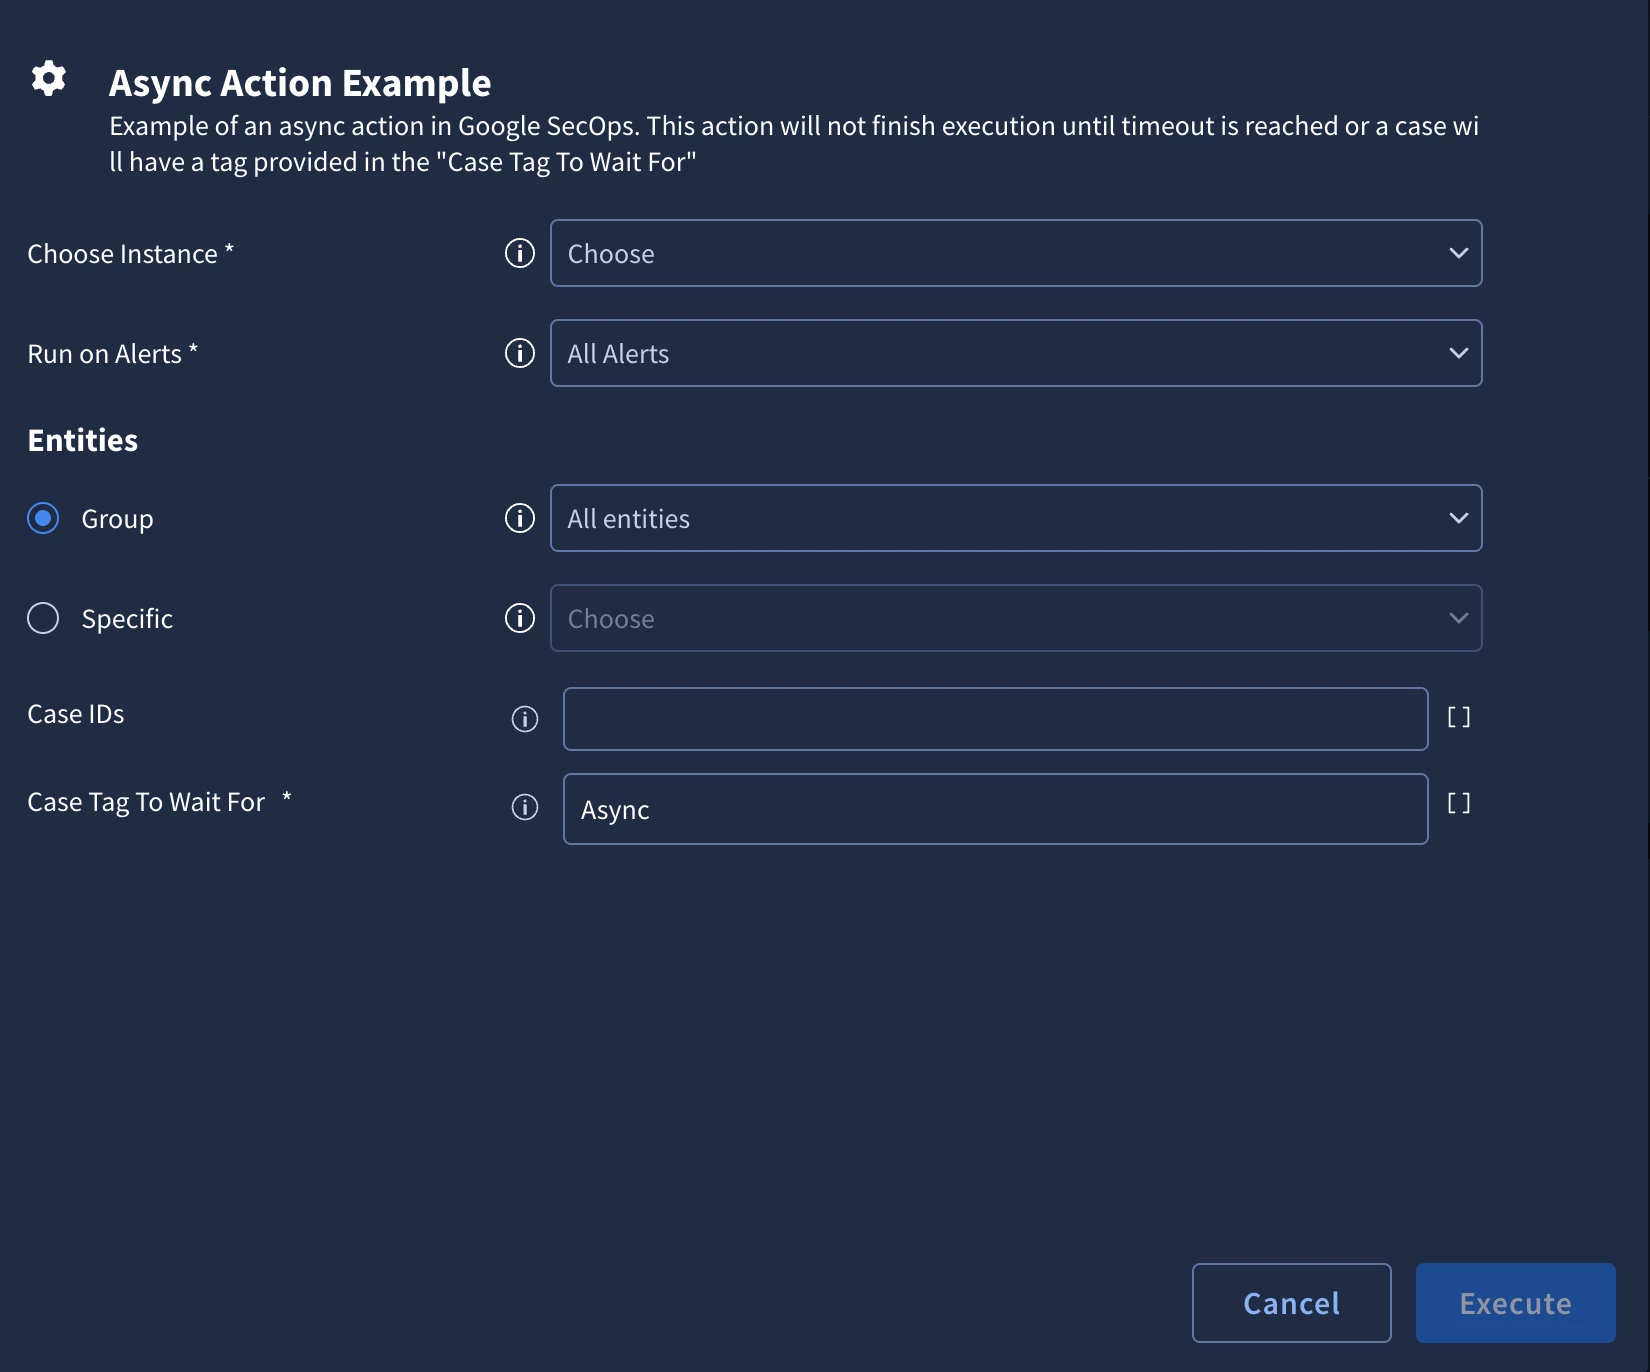
For this action, we created a simple use case, when the action will wait until something happens on the case. In this scenario, the action will wait until all provided cases will have a tag “Async”. It’s good learning experience to see, how the whole state management is done.
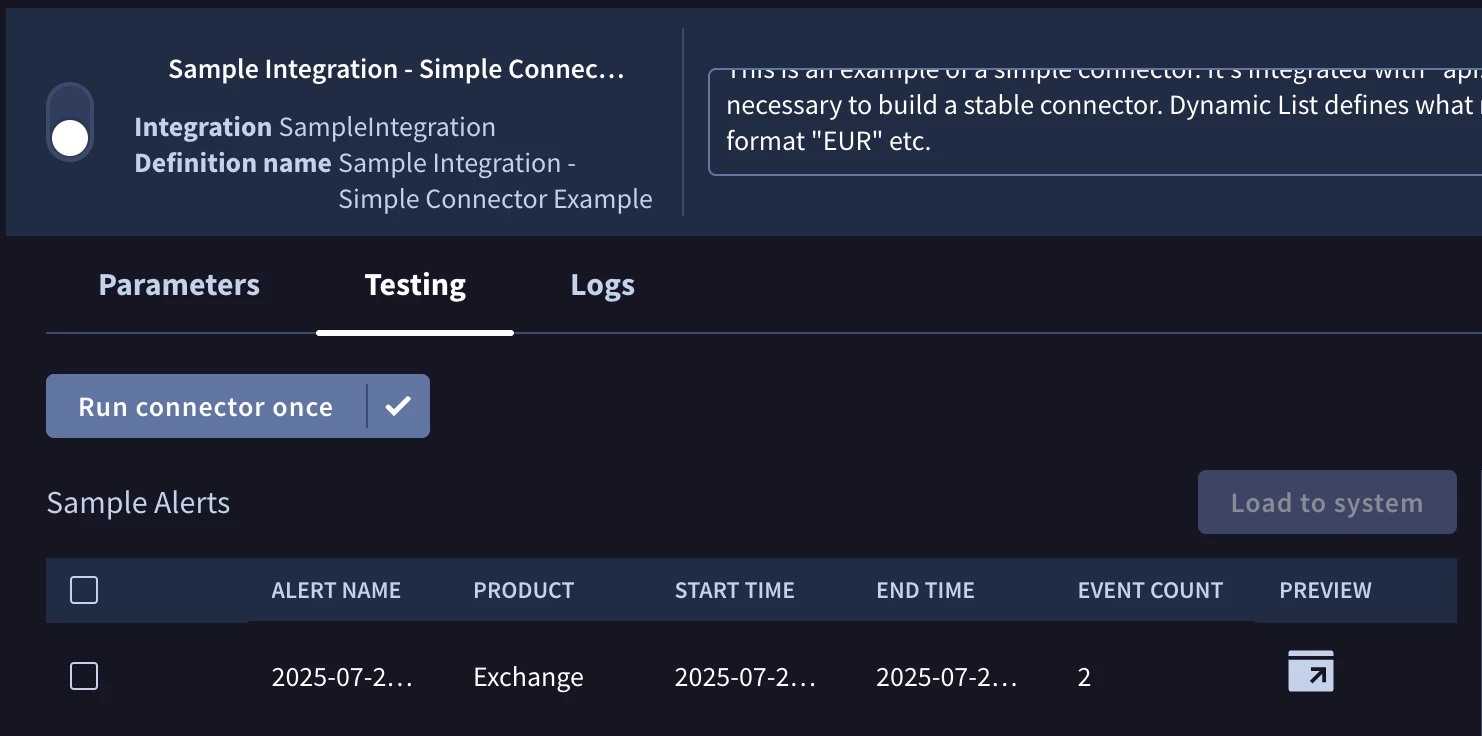
Simple Connector Example
As part of this integration we also have an example of Simple Connector. The way it works is that it will create Alert objects based on the Exchange Rates for the currencies provided in the “Currencies To Fetch” parameter.
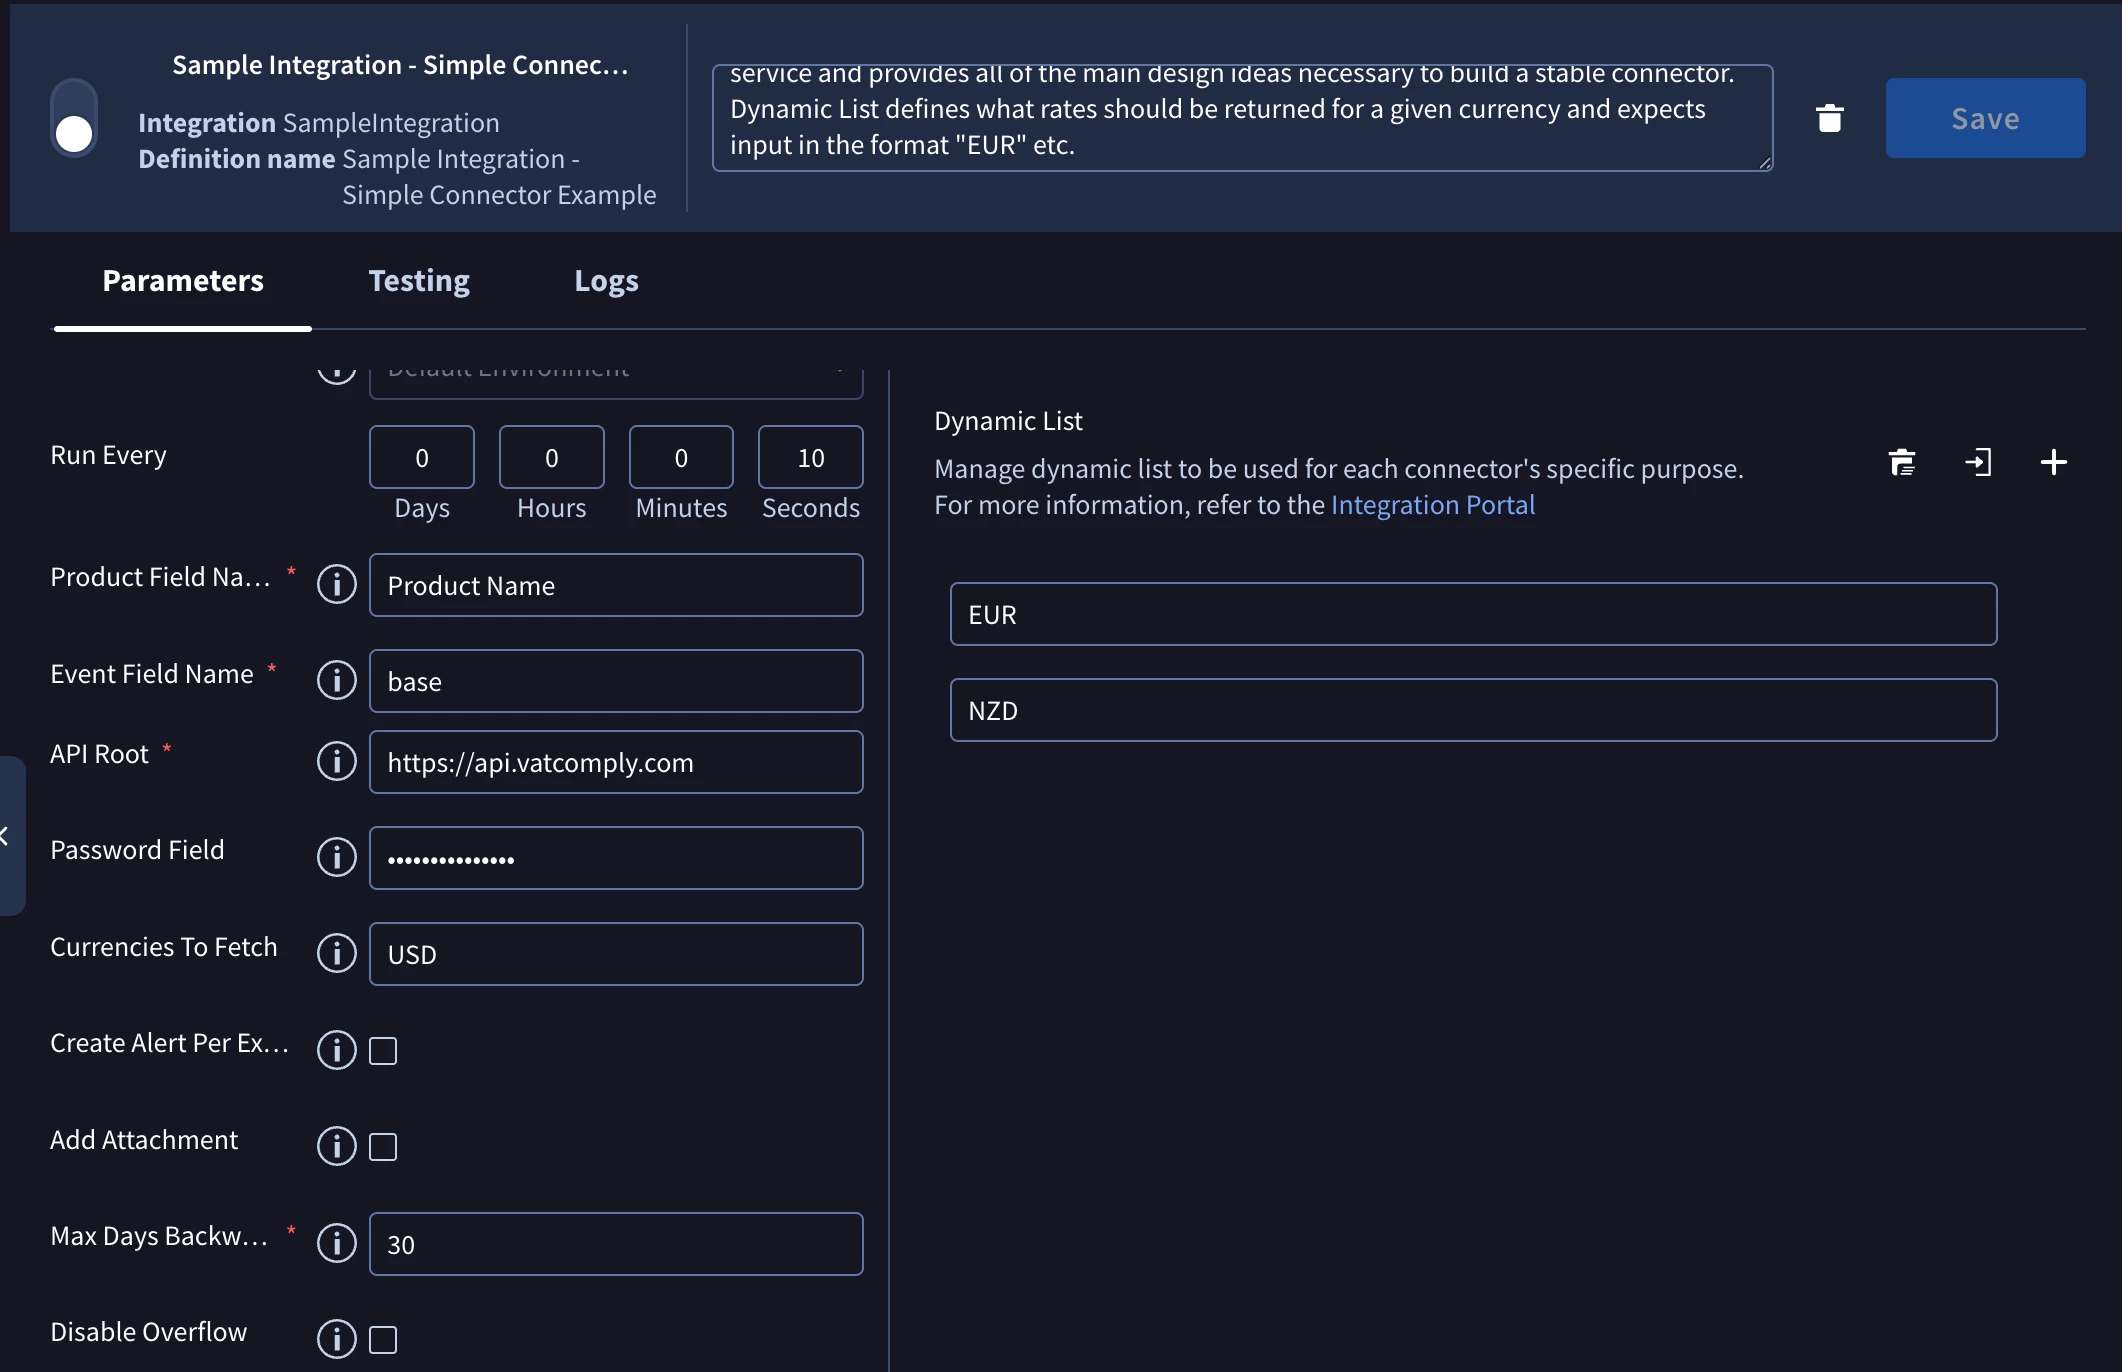
In the connector, you will see, how to build an Alert object based on the Connector Parameter, how to track timestamps, how to store data in the Connector context, so it can be shared between connector iterations. It’s a very good place to learn the architecture of Connector.
This connector showcases, how you can work with Dynamic Lists. For example, in this connector, it’s expected that in the dynamic list you will provide currencies for which you want to see exchange rates against that base currency.
In the image above, the configuration will return me 2 exchange rates: USD - EUR and USD - NZD. If you have parameter “Use dynamic list as a blocklist”, then connector will work in reverse and return all exchange rates except for USD - EUR and USD - NZD.
No Dynamic List values:

Dynamic List values EUR and NZD:
Dynamic List values EUR and NZD with “Use dynamic list as a blocklist” enabled:


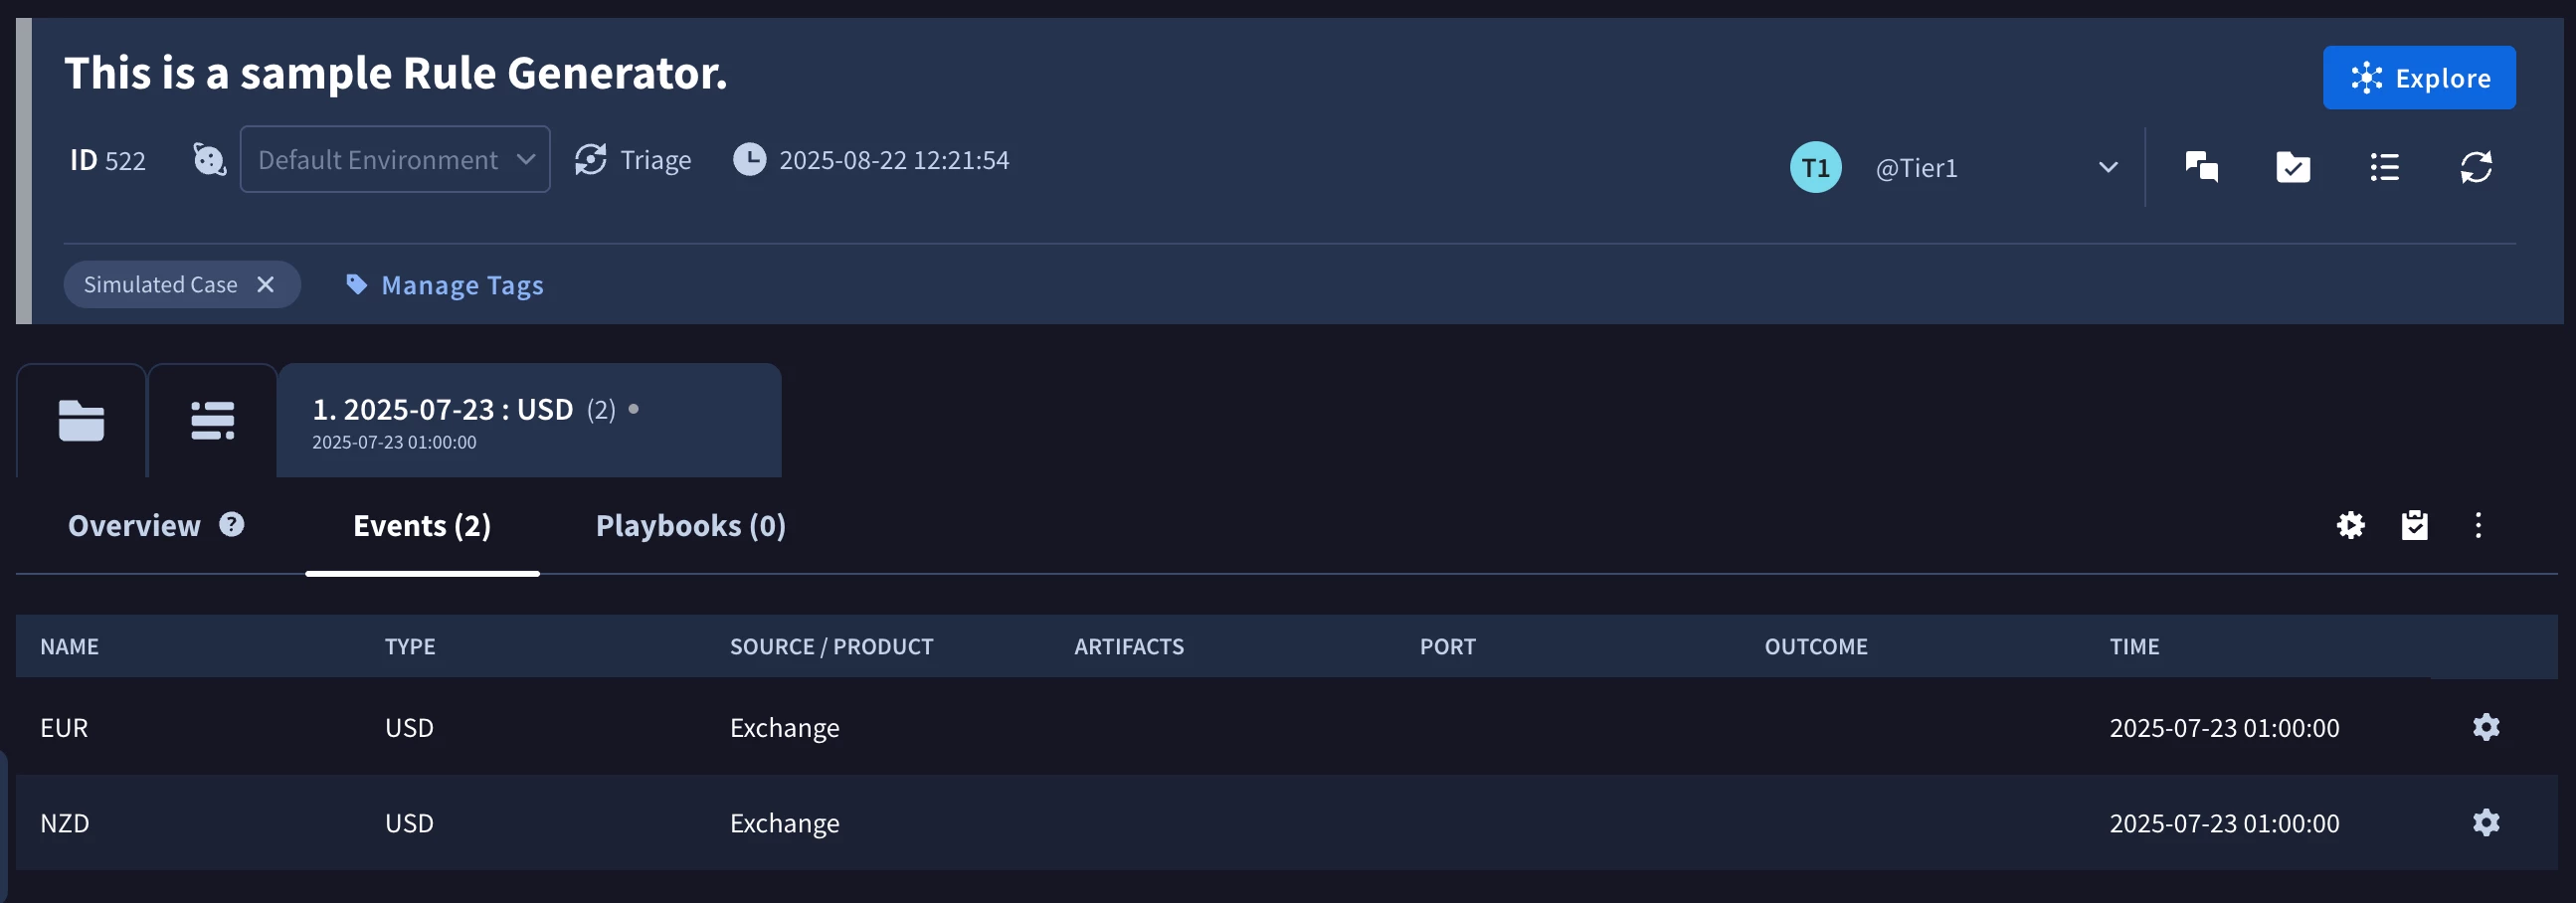
This connector also features ability to create Alerts in different ways. For example, if parameter “Create Alert Per Exchange Rate” is disabled, then the connector will create 1 SecOps Alert, where it will be a base currency and all of its exchange rates as SecOps Events (dynamic list values EUR and NZD were applied):
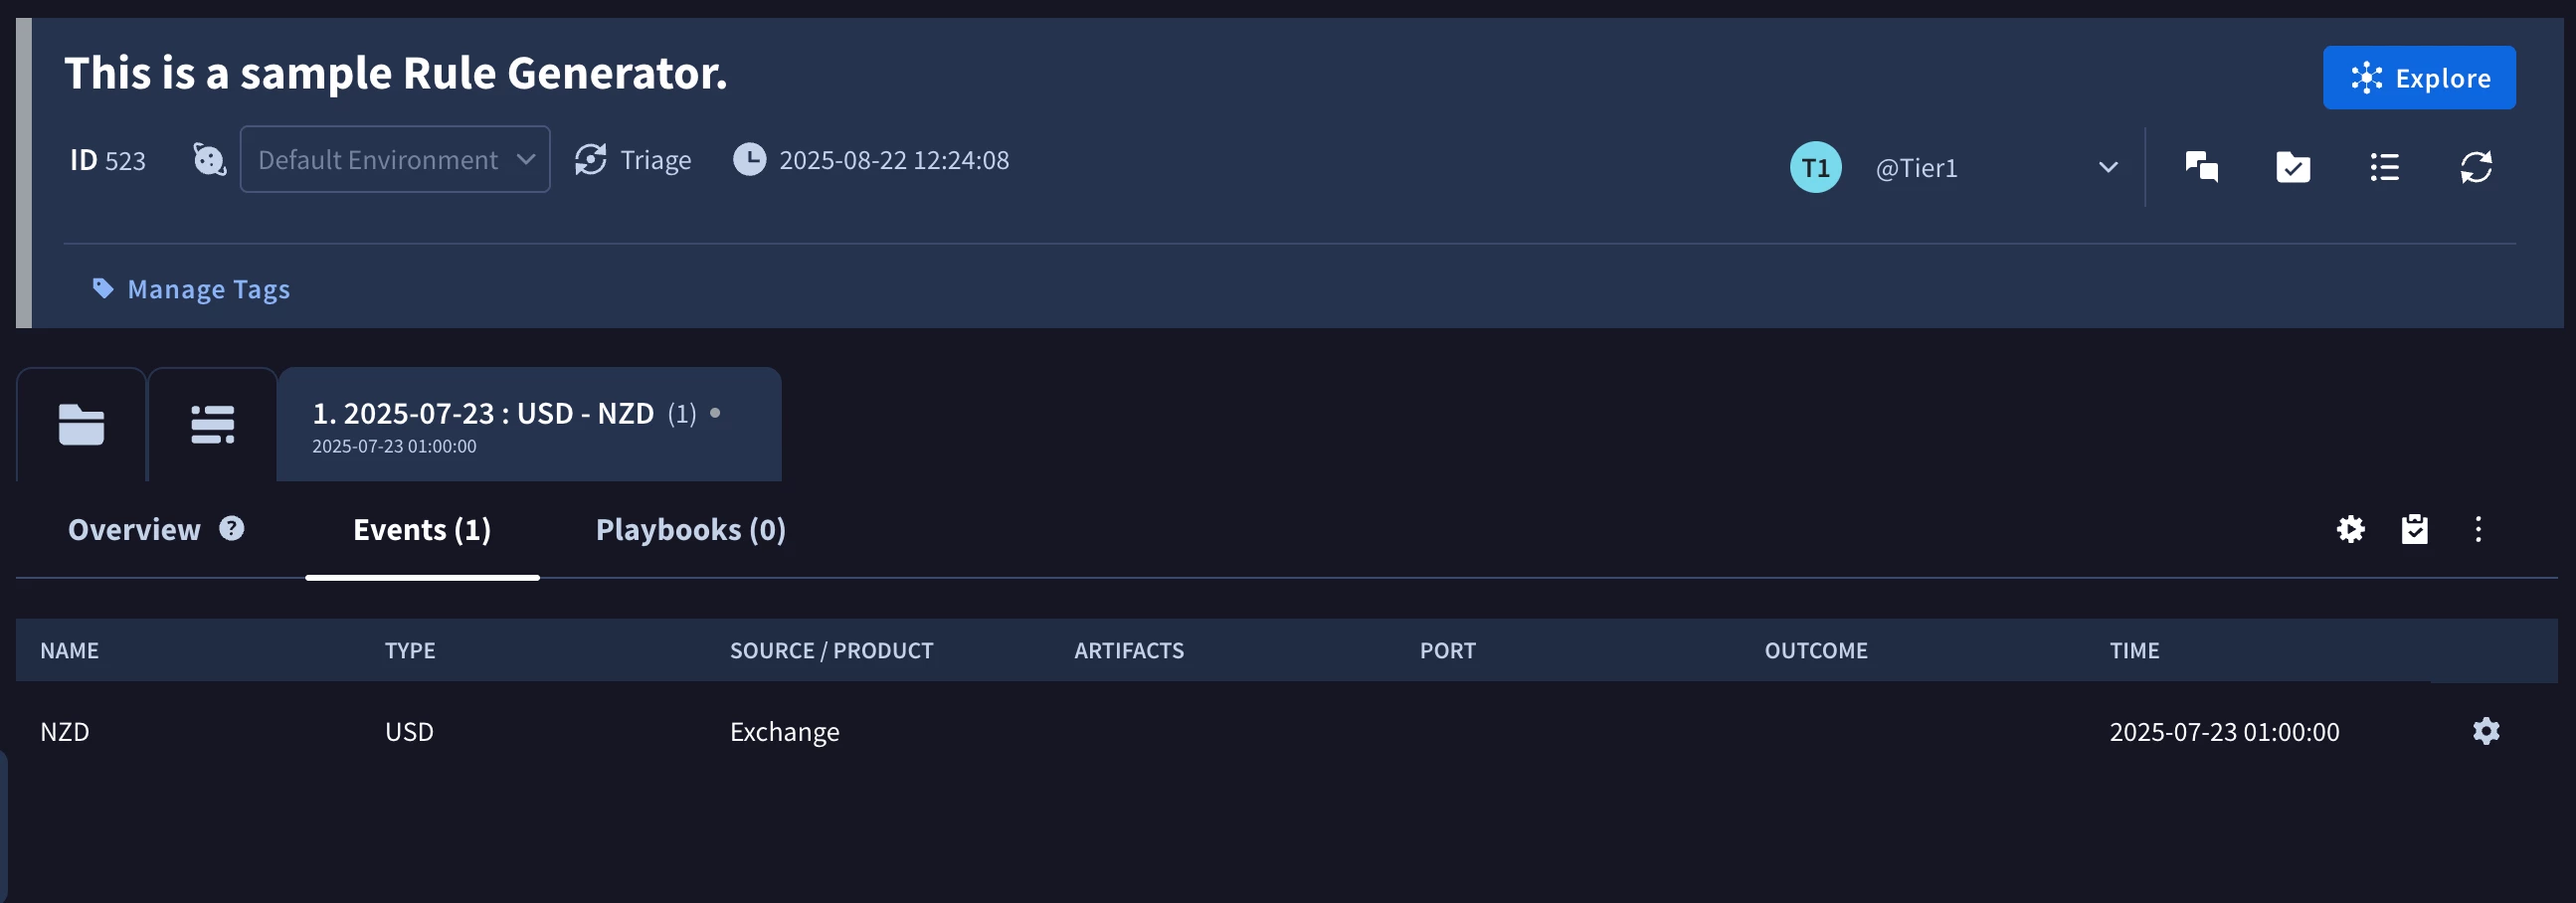
But if I will have the parameter enabled, then you will see that the connector will create 2 Alerts with 1 event tied to the specific exchange rate:

Eventually, this example highlights that you have full flexibility in terms of how Alert object can be created and you can use this example for your inspiration.
Overflow
Overflow is mechanism that allows the platform to reduce noise and to not create similar alerts, if they were happening in a short period of time, but as we know, a lot of people prefer to have all alerts ingested always, so this connector shows you, how you can control it. Note: there is also an overflow mechanism at the platform level, which can’t be overwritten.
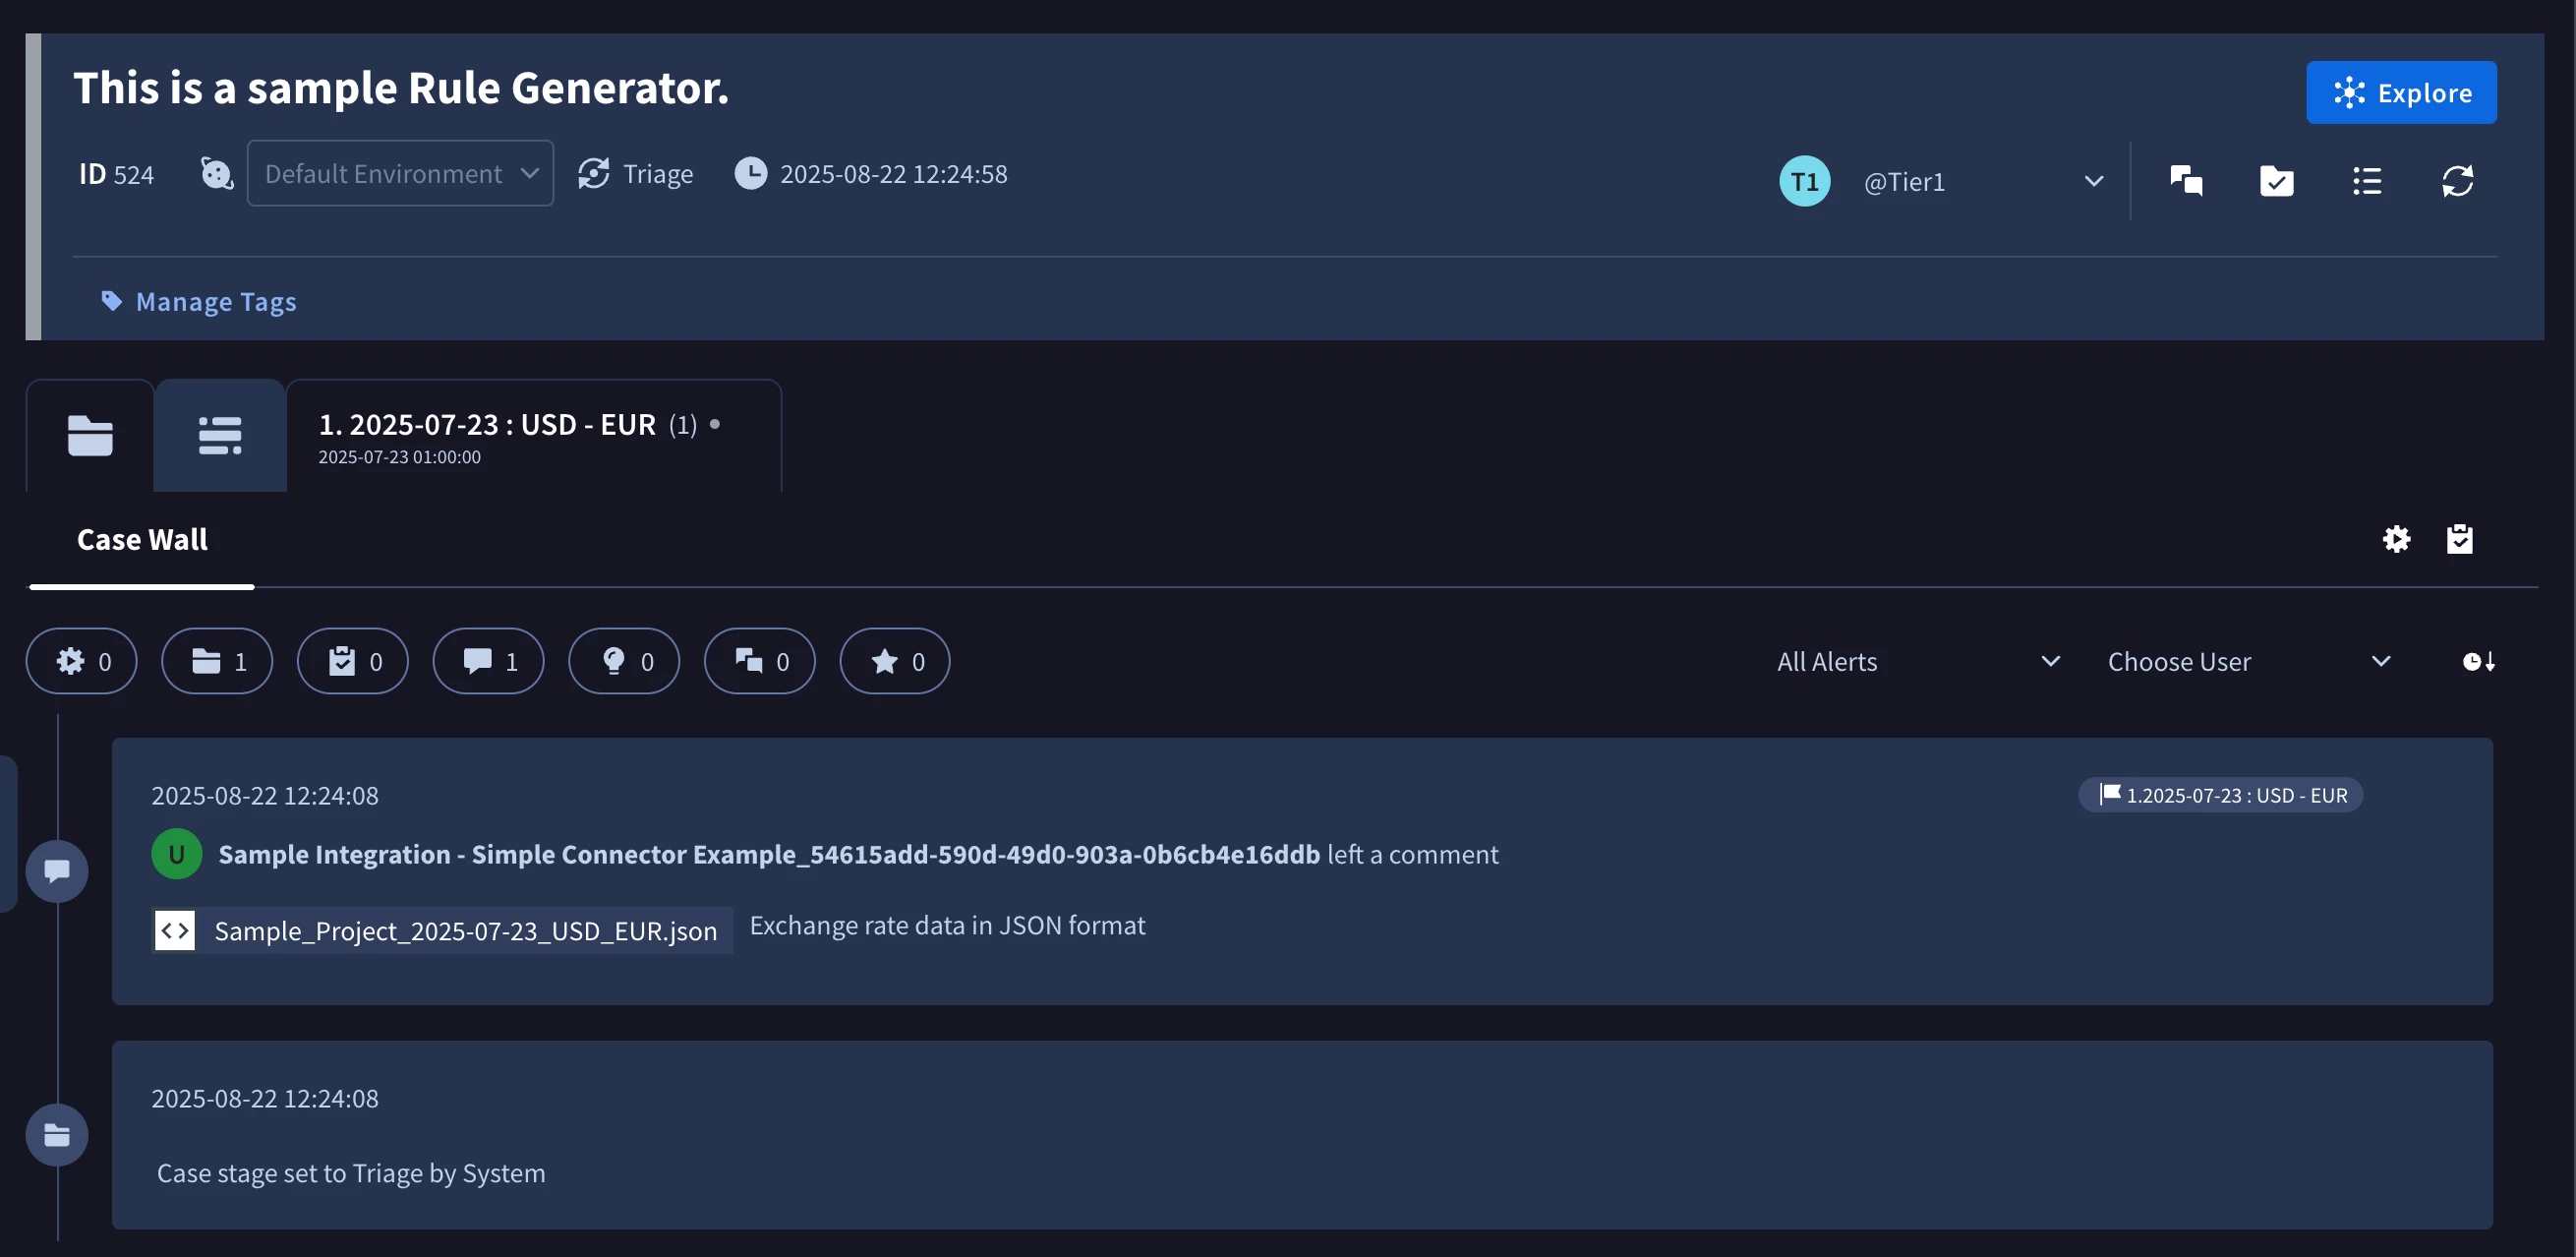
Attachment
It’s possible to add an attachment through the connector execution. In this connector you can control it via “Add Attachment” parameter.
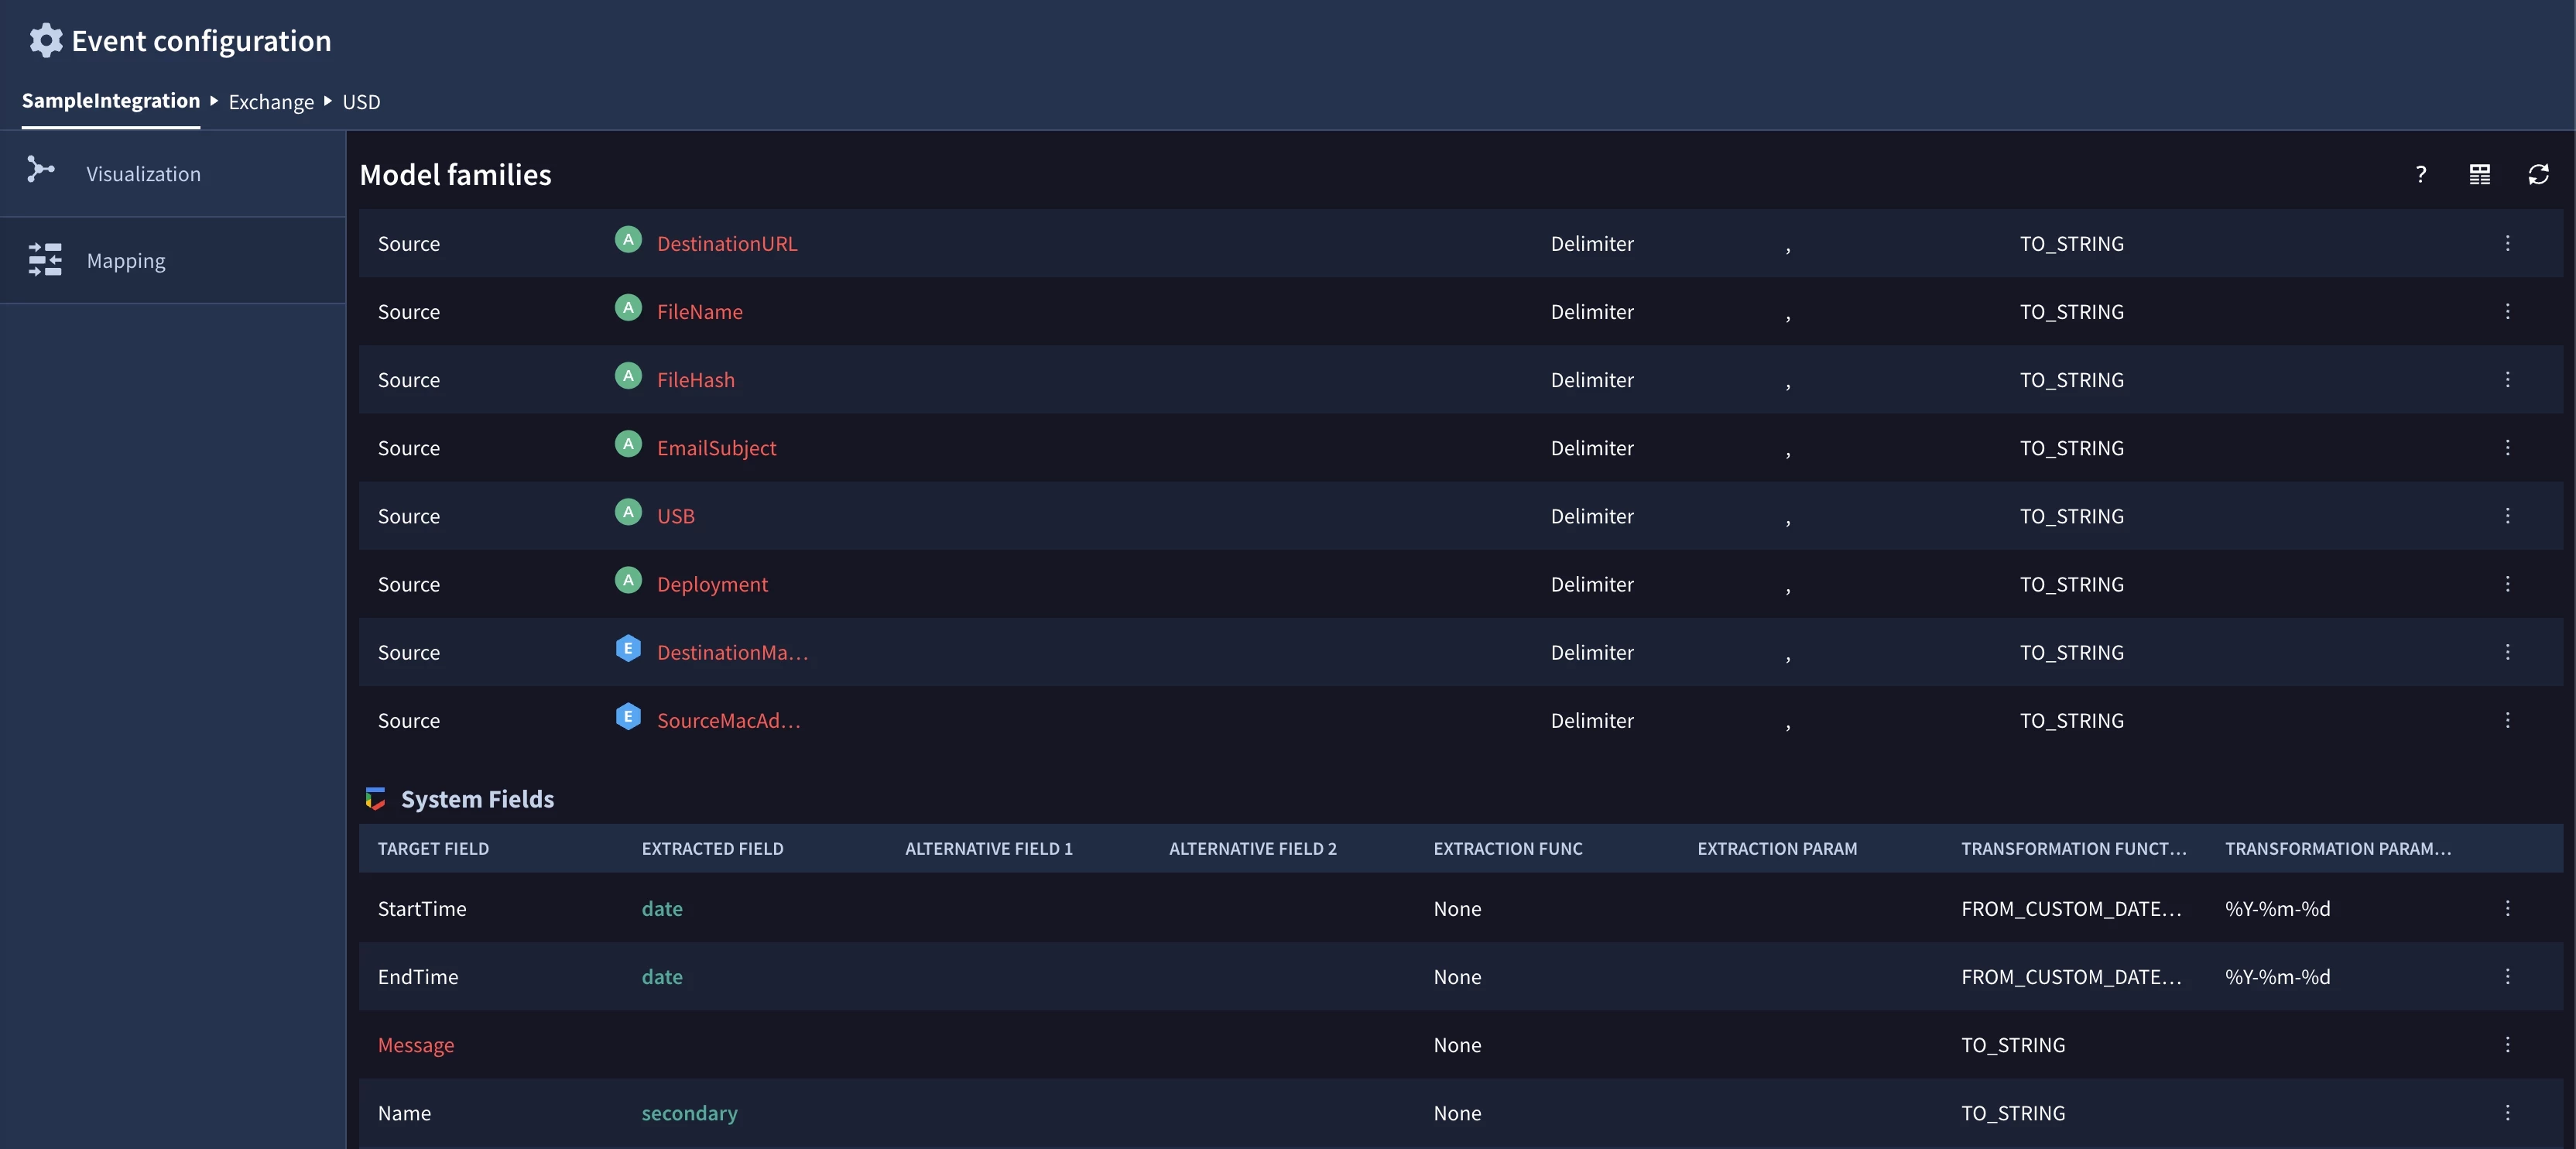
Ontology Mapping
As this connector is very simple, the Alerts created with are simple and the ontology mapping is also simple, but you can still use it as an example, of how it looks like programatically.

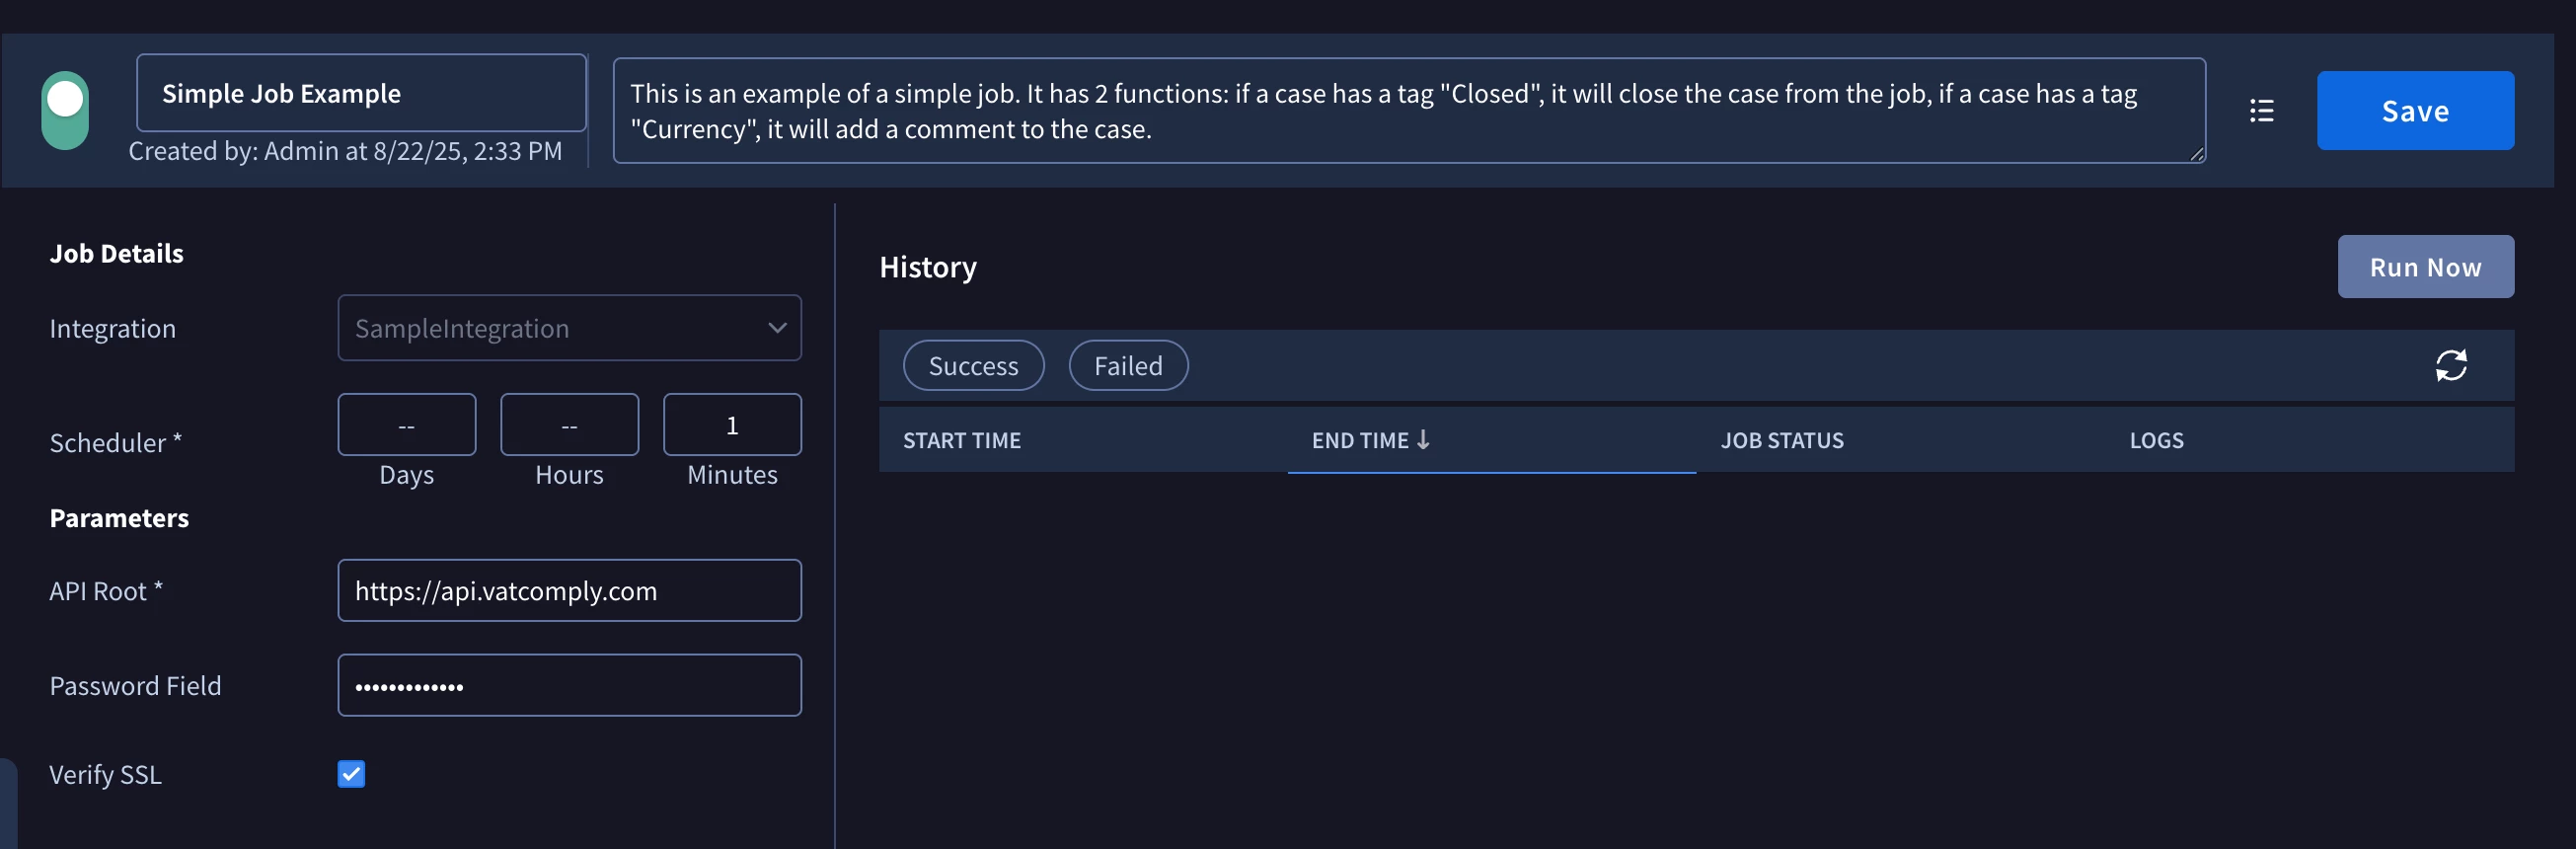
Simple Job Example
Lastly, let’s talk about the Jobs. Jobs are primarly used to perform synchronization operations around cases. So, in this example we highlight 2 most common workflows:
- Automatically close the case from the Job
- Add comments to the case from the Job
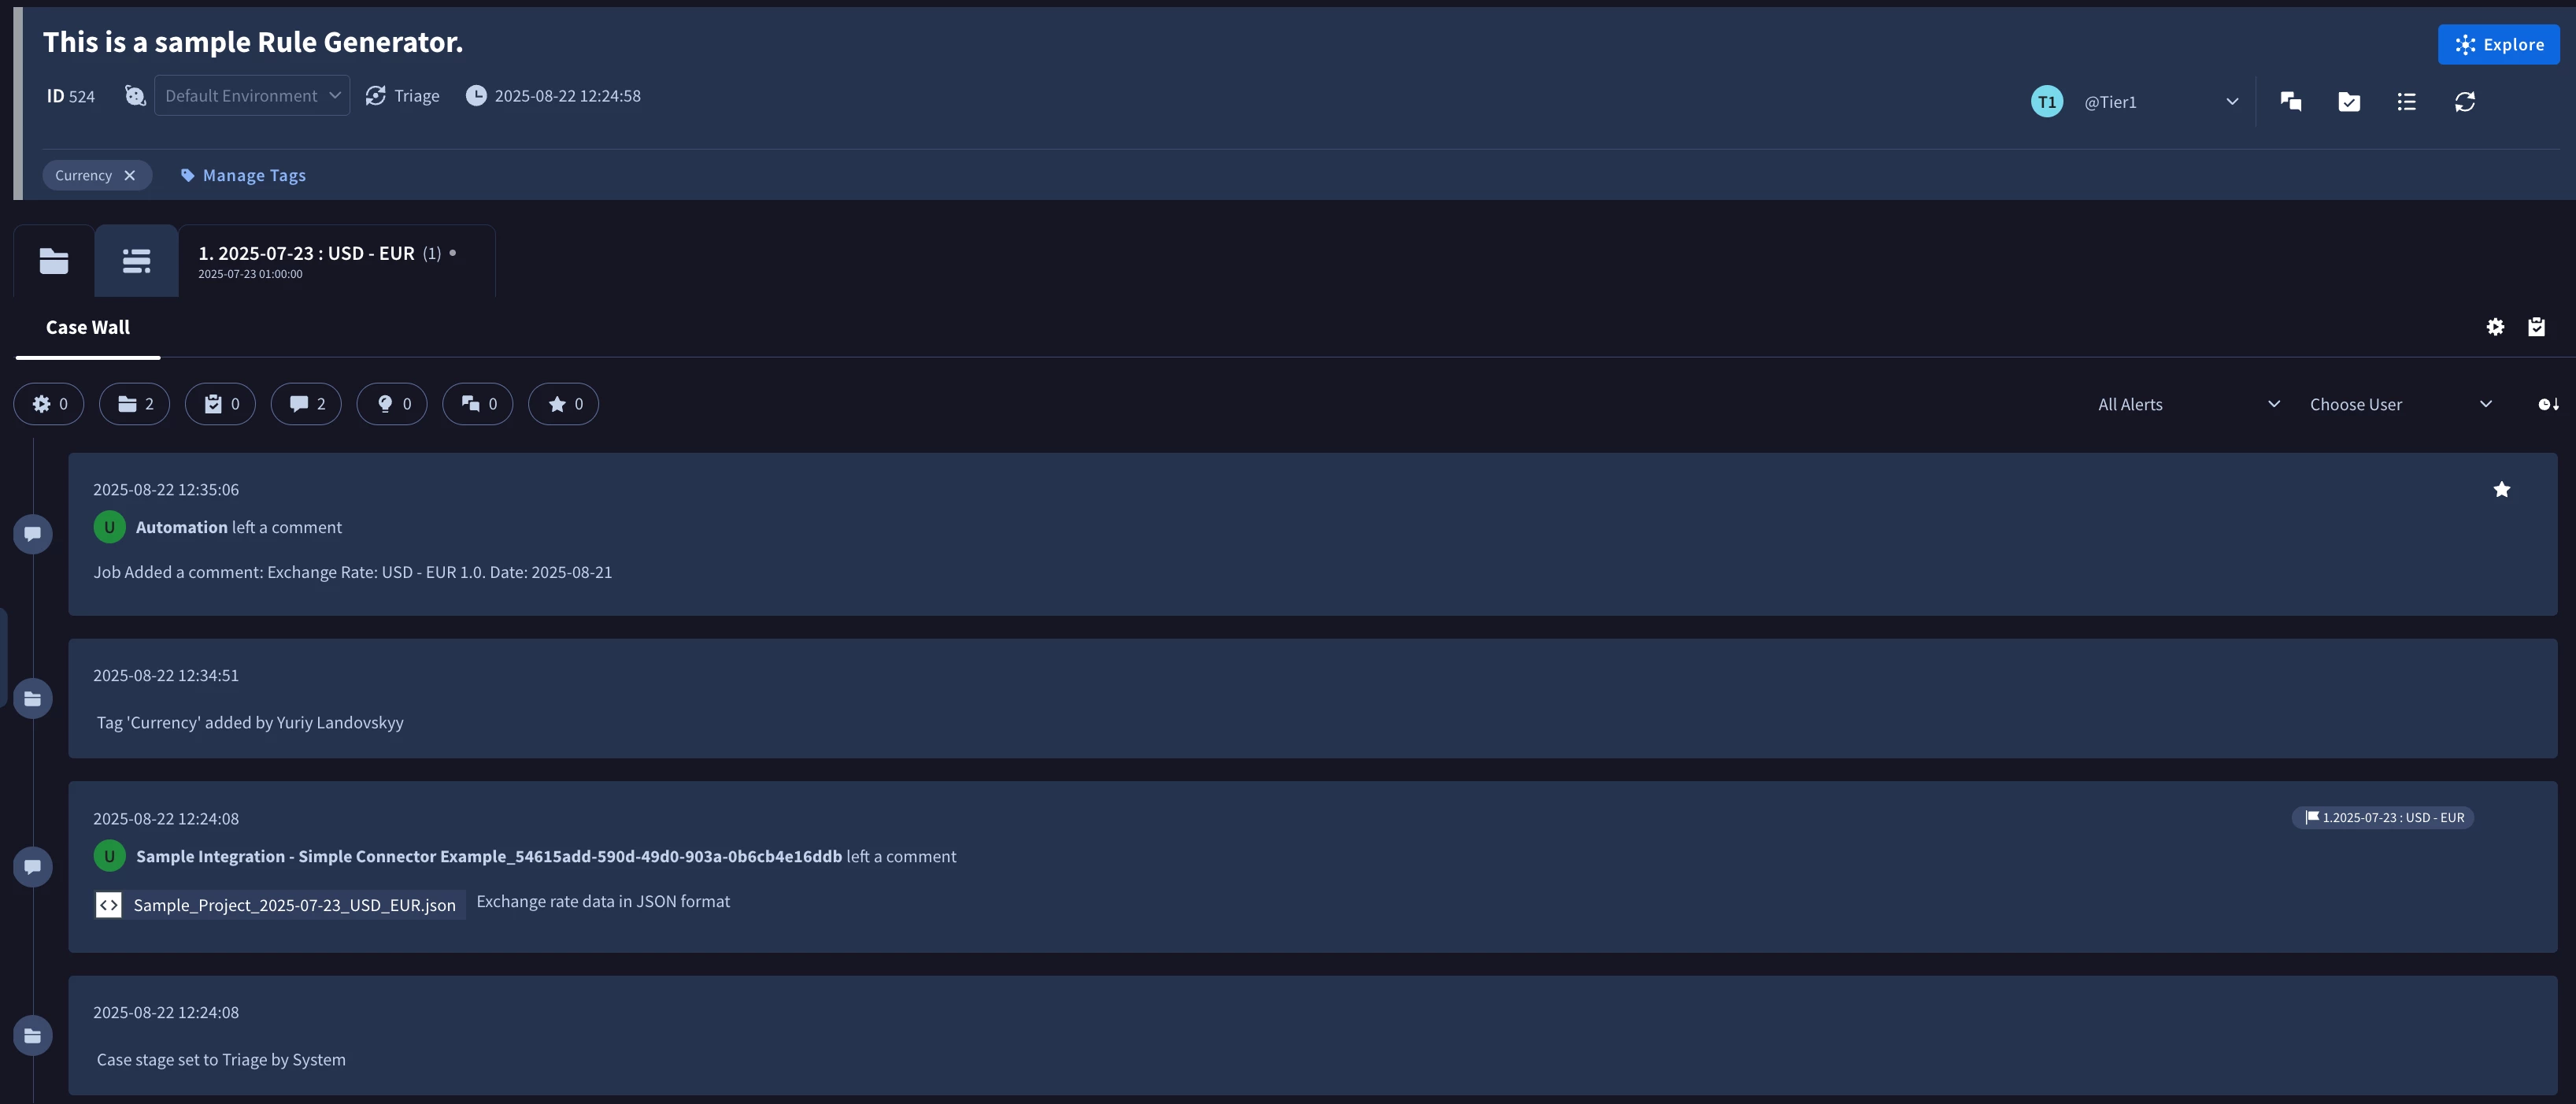
Let’s use the same case, where we had an connector attachment from images above. I will add a tag “Currency” to it and now it’s expected that the Job will add a comment to that case.
Now, if I will add a tag “Closed”, the case will be closed by the Job:
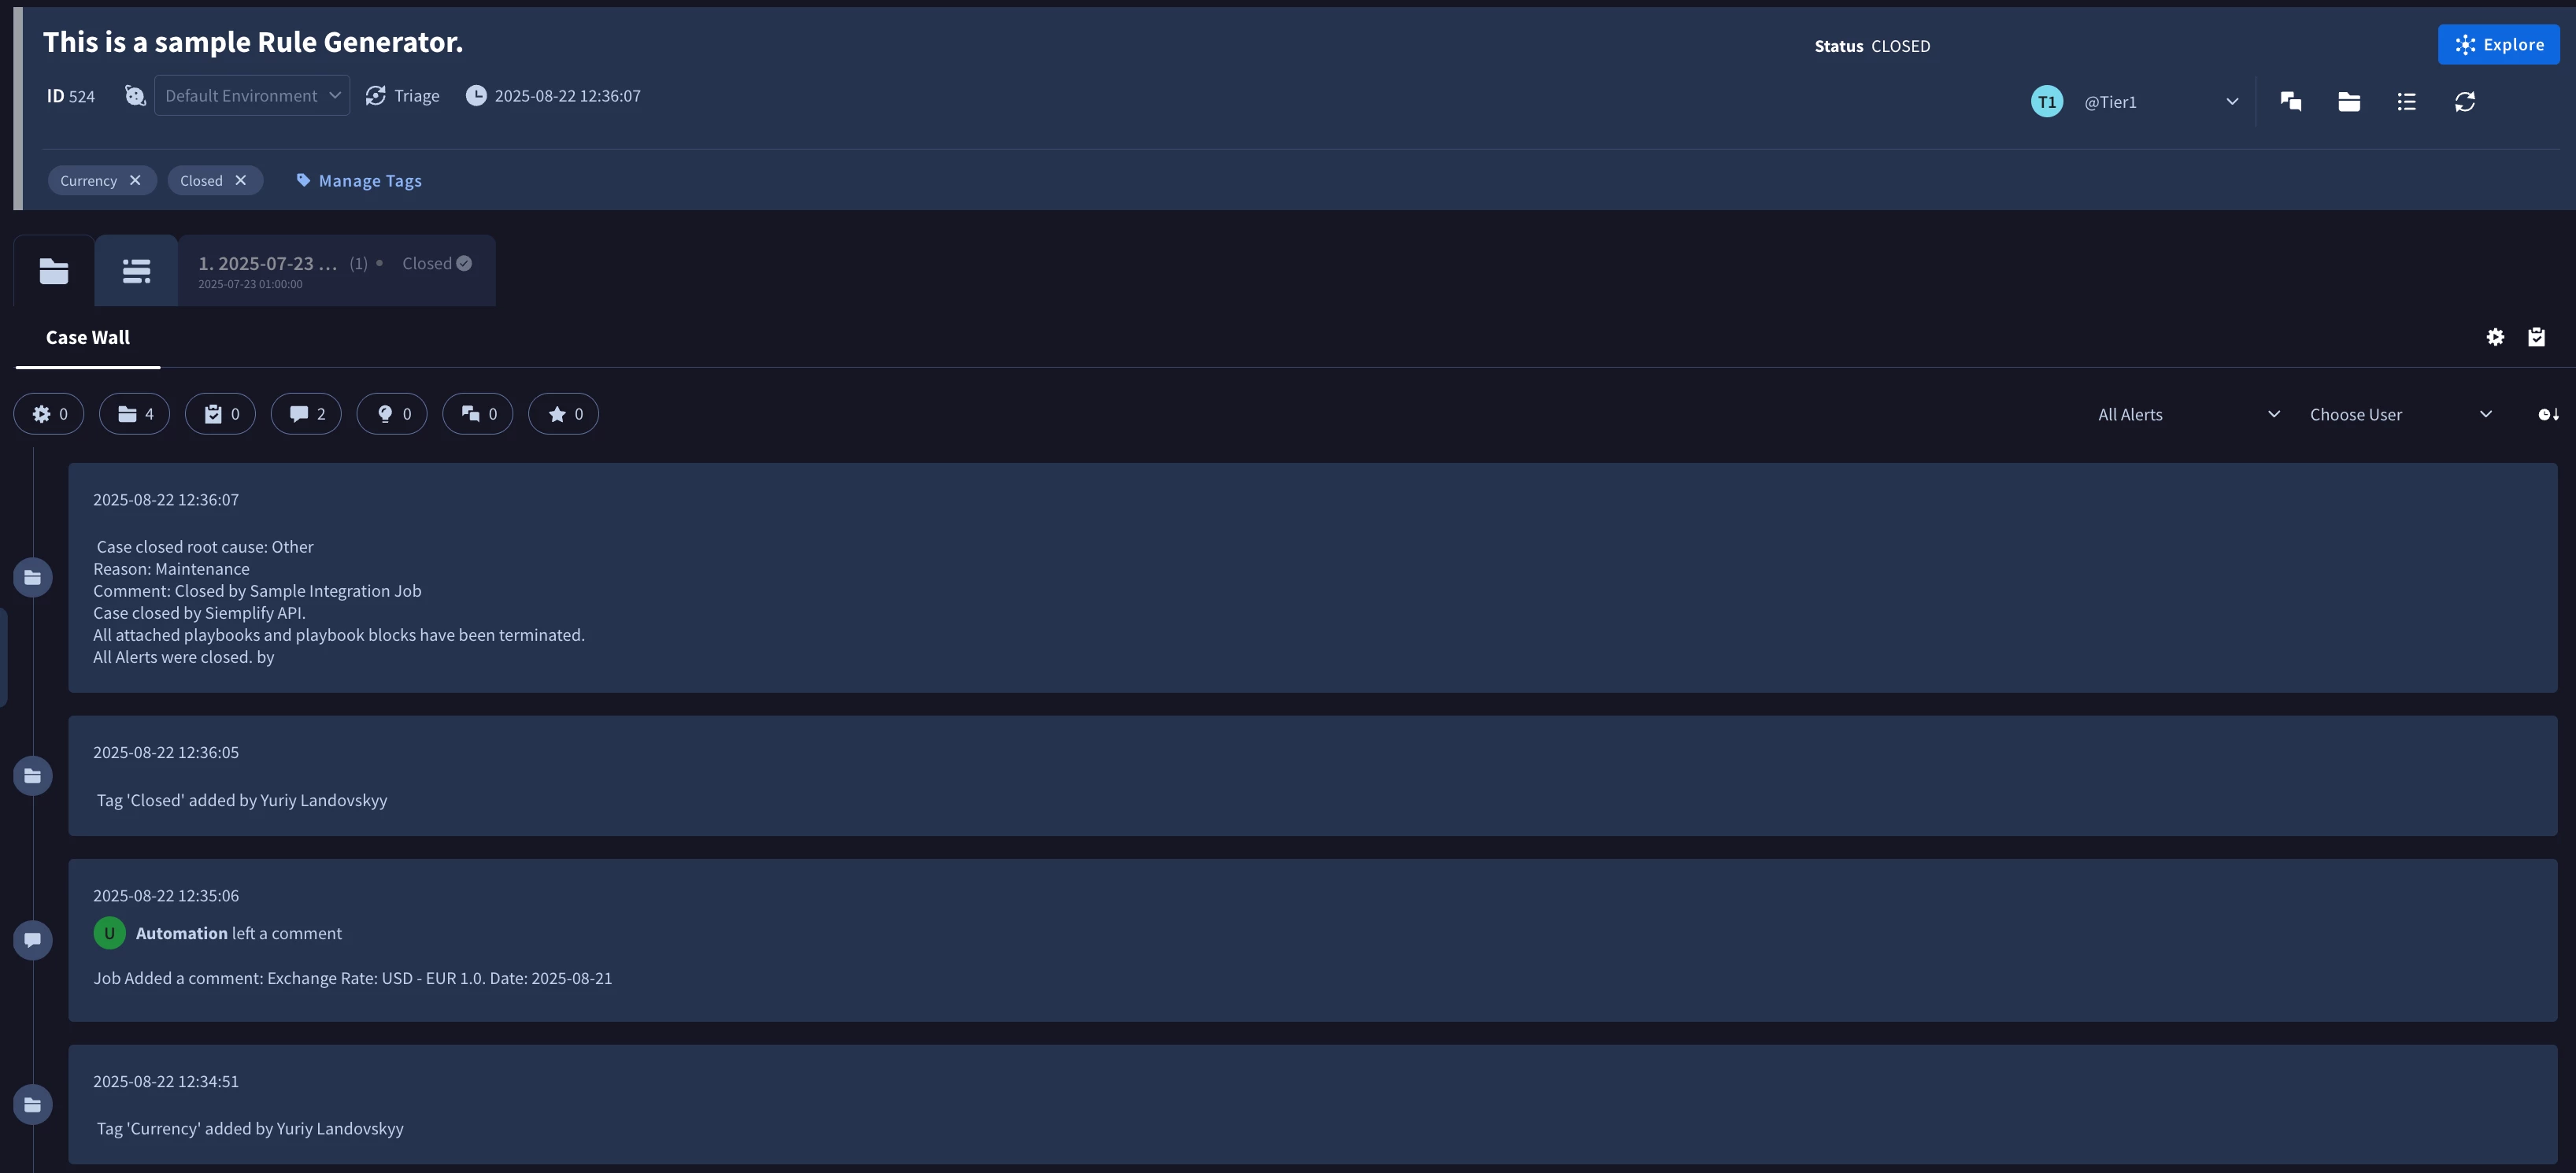
Overall, there is a lot of important concepts added as part of this job, for example, how to track the state of cases inside the job iteration and how to store this data for future iterations, so if you are planning to create a job that will synchronize Google SecOps with 3rd party products, this example is a very good start!
Predefined Widgets
All actions with a JSON result in this integration feature a Predefined Widget, but as there is currently no easy way to have predefined widgets in the custom code, in this guide we will not put emphasis on it.
Additional Useful Resources