

Table of Contents
The Security Command Center Enterprise tier provides security enhancements such as advanced security operations, integrations with other Google Cloud products such as Sensitive Data Protection and Assured OSS, multi-cloud support, and risk analysis.
Prerequisites
- Users should have valid authentication and the ability to access the homepage and its features.
- Entitlement for Security Command Center Enterprise
- Create an organization
- Create the management project
- Appropriate Role(s) to configure Permissions
Actions

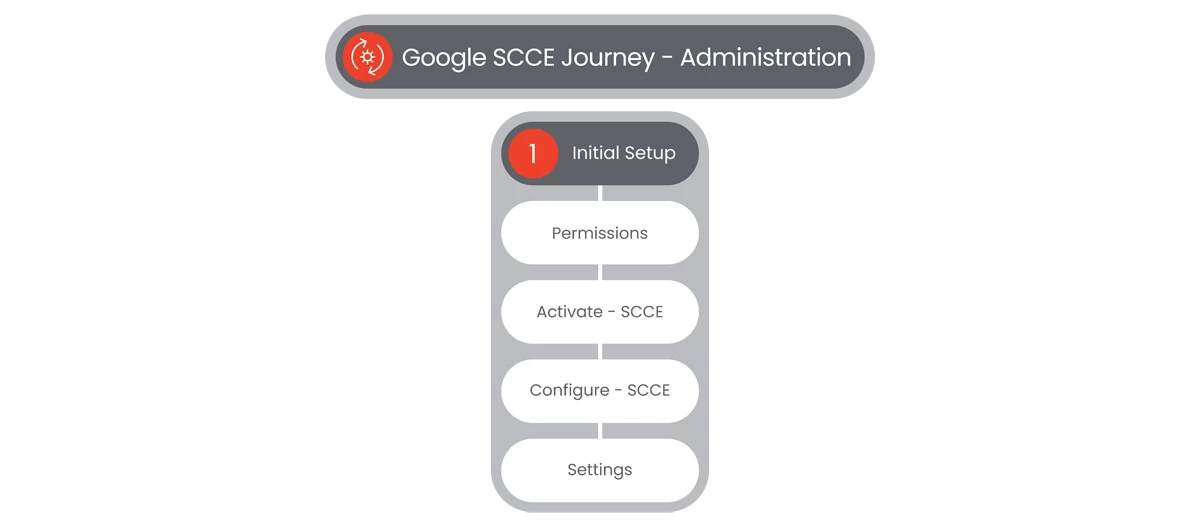
Permissions
The Security Command Center Enterprise's permissions required for initial setup include Identity and Access Management roles that must be granted to the organization and management project.
Steps
- In the Google Cloud Console, users will select Navigation Menu.

- User will need to make sure that they have the following role or roles on the organization:
- Organization Administrator (roles/resourcemanager.organizationAdmin)
- Cloud Asset Owner (roles/cloudasset.owner)
- Security Center Admin (roles/securitycenter.admin)
- Security Admin (roles/iam.securityAdmin)
- In the Google Cloud Console, in the left Navigation side-bar, users will select IAM & Admin, and navigate to the IAM page by selecting IAM at the top of the popout.
- Users will select their organization and choose the Allow tab in the IAM dashboard.
- In the Principal column, users will find all rows that identify the user or a group that they are included in.
- For all rows that specify or include the user, check the Role column to see whether the list of Roles includes the required roles.
- Verify that the user has the following Role or Roles on the organization:
- Organization Administrator (roles/resourcemanager.organizationAdmin)
- Cloud Asset Owner (roles/cloudasset.owner)
- Security Center Admin (roles/securitycenter.admin)
- Security Admin (roles/iam.securityAdmin)
- If the user does not, select the checkbox by the user in the Principal column and select the Grant Access button.

- A Grant Access To popout will appear. From there users can assign:
- New Principals
- Select a Role
- Enter the Select a Role field, and in the Filter field, enter the required Role(s).
- If users need to change or Manage the Role, select Manage Role at the bottom of the Select a Role popup.
- To add additional roles, users will select the Add Another Role button.

- Once all of the Roles have been selected, users will select the Save button.
Relevant Documentation Links

Activate - SCCE
Activating SCCE is a key step in your onboarding journey. Follow the steps below to get started.
Steps
- In the Google Cloud Console, users will select Navigation Menu.

- In the Google Cloud Console, in the left Navigation side-bar, users will see the Security Command Center dropdown.
- Verify that you are viewing the organization that you want to activate the Security Command Center Enterprise tier on.
- Users will select Risk Overview.

- At the top of the page, users will select, under Activate Security Command Center Enterprise, the Start Activation button. The Activate Security Command Center Enterprise page will appear.
- In the center of the page, users will see instructions on how to Get Started with Security Command Center Enterprise. To begin, users will select the Activate Enterprise button.

- The Provide Setup Details page will appear. Users will enter information Under:
- Set Up Threat Detection, Response, and Case Management
- Set Up a Management Project
- Enable API
- Under Set Up Threat Detection, Response, and Case Management, users will enter customer and company information.
- Under Set Up a Management Project, users will specify a SCCE Management Project.
- Under Enable API, user will acknowledge and enable the API needed to create Google SecOps instance for threat detection, response, and case management, by selecting the Enable Google Security Operations API button.

- Once clicked, the user will see a confirmation message replacing the Enable Google Security Operations API button with a API Enabled message.
- Then when users see the API Enabled message, users will select the Activate Button.

Relevant Documentation Links

Configure - SCCE
Let’s configure the instance! Follow the steps below to complete the setup.
Steps
- At the top of the page of the SCCE Setup section on the Risk Overview page, after selecting the Activate button in the Activation stage, there will be a new page appearing when activation begins. A message will appear at the top of the page stating that Provisioning in Progress.
- Users will see three sections with individual steps and tasks:
- Configure Basic Settings and Integrations
- Configure Functionality
- Configure Advanced Settings
- Under the Configure Basic Settings and Integrations section, users will see six tasks, listed as steps:
- Step 1: Grant Permissions to Service Accounts
- Step 2: Provision Security Command Center Enterprise Services
- Step 3: Set Up Amazon Web Services (AWS) Integration
- Step 4: Set Up Users and Groups
- Step 5: Configure Integrations
- Step 6: Configure Log Ingestion
- Under the Configure Functionality section, users will see four tasks, listed as steps:
- Learn About How to Set Up Identity Search
- Set Up Sensitive Data Protection
- Set Up Code Security
- Set Up Vulnerability Assessment
- Under the Configure Advanced Settings section, users will see seven tasks, listed as steps:
- Create a Resource Value Configuration
- Review Services
- Customize Alerts
- Create a Playbook
- Configure Group Logic
- Configure Issue Owners
- Create a Mute Rule
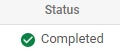
- Upon the start of the Provisioning in Progress process, users will see the status of each task to the right stating whether the task is:
- Completed
- In Progress
- Blank (If task has yet to be started or is not available at this stage).
- Completed
- Upon start of the Provisioning in Progress process, users will see the first two steps should be automatically completed, as they see the Provisioning in Progress process updates:
- Step 1: Grant Permissions to Service Accounts
- Step 2: Provision Security Command Center Enterprise Services
- In Step 3: Set Up Multi-cloud Connectors, users will select the title of the step, to bring up the Settings page of Security Connectors. On that page, users will select the Add Connectors selection at the top of the table, next to the word Connector.
 and select a Connector from the dropdown menu and the Configure Connector page opens.
 - In Delegated Account ID function, users will enter (AWS in this example) the AWS account ID for the AWS Account that you can use as the delegated account.
- To let Sensitive Data Protection profile your AWS Data, keep Grant Permissions for Sensitive Data Protection Discovery selected, by selecting the check box.
- Optionally, users can review and edit the Advanced options. Click Continue and the Connect to AWS page opens.
- Users can't change the role names after they create the connection. Do not click Create. Instead, Configure the AWS environment, then select Create.
- In Step 4: Set Up Users and Groups, users will select the title of the step, to bring up the Google SecOps platform page for SOAR Settings> IAM Role Mapping, to map IAM Roles with the relevant Google SecOps permission sets.
- Users with IAM roles that are not mapped in the table will be given the default settings below the table, which consist of the following selections:
- Default Role selection toggle
- SOC Role
- Permission Group
- Environments
- When complete, users will select to Save.
- In Step 5: Configure Integrations, users will select the title of the step, to bring up the Google SecOps platform page for Response> Integrations Set Up> Shared Instances.
- Users will select the Create a New Instance button to the right of the Search function at the top right of the page.

- Users will see a Configure Instance pop-up, with the following fields to fill in:
- Environment
- Instance Name
- Description
- Users will be able to Test the Instance by selecting Test.

- In Step 6: Configure Log Ingestion, users will select the title of the step, to bring up the Google SecOps platform page for Settings> SIEM Settings> Feeds page.
- On the Feeds page, users will click Add New.
- In the Add Feed field, users will enter the Source Type dialog to select the Ingest Feed.
- In the Log Type menu, users will select the service and click Next.
- Users will enter the input parameters for the selected feed in the fields, and select Next, then Finish.
- The Set Up Guide has additional options under:
- Configure Functionality
- Configure Advanced Settings
- Under Configure Functionality, users have the following options:
- Learn About How to Set Up identity Security
- Set Up Sensitive Data Protection
- Set Up Code Security
- Set Up Vulnerability Assessment
- Under Configure Advanced Settings, users have the following options:
- Create a Resource Value Configuration
- Review Services
- Customize Alerts
- Create a Playbook
- Configure Group Logic
- Configure Issue Owners
- Create a Mute Rule
Relevant Documentation Links
- [All Steps] https://cloud.google.com/security-command-center/docs/how-to-configure-security-command-center
- [Additional Steps] https://cloud.google.com/security-command-center/docs/activate-enterprise-tier

Settings
The Settings section allows you to customize and manage your preferences, configurations, and system options.
- At the top of the page of all SCCE pages, users will see at the top right, a Settings selection button.

When selected, the Settings page for SCCE will appear.
Note: These options are only visible if you are the Organizational Level. - Users can select Settings from all sections under SCCE, which will bring users back to the Risk Overview section, but display the Settings page.
- The Settings page consists of seven options:
- Services
- Integrated Services
- Continuous Exports
- Mute Rules
- Attack Path Simulations
- Connectors
- Tier Details
- Under the Services section, users can choose from the following Settings:
- Security Health Analytics
- Web Security Scanner
- Event Threat Detection
- Container Threat Detection
- Virtual Machine Threat Detection
- Vulnerability Assessment
- Under the Integrated Services section, users can choose from the from several Settings from Marketplace, to include (Note: Turning off the following services does not stop them from operating, but their findings will no longer appear in Security Command Center):
- Cloud Anomaly Detection
- Cloud Armor
- Sensitive Data Protection
- IAM Recommender
- VM Manager
- Under the Continuous Exports section, users can choose to create a Pub or Sub Export. Continuous Exports let’s users transfer security findings to other tools for further analysis.
- Users will then select:

- Name
- Description
- Project Name
- Where to Export to
- Findings Query
- Matching Findings
-
After completion, users will select Save.
Note: After saving users can manage Pub/Sub Exports by visiting Security Command Center Settings > Continuous Exports. - Under the Mute Rules section, users can choose to Create a Mute Rule by selecting the Create Mute Rule button.

- Users will select between the two following options in the dropdown menu:
- Dynamic Mute Rule
- Static Mute Rule
- A Create Dynamic/ Static Mute Rule page will appear, with the following options:
- Mute Rule ID
- Description
- Parent Resource
- Choose Mute Rule Actions
- Choose Findings to Mute
- Findings Query w/ Filter
- When complete, users will select Save.
- Under the Attack Path Simulations section, users can choose to:
- Create New Configuration
- View Valued Resources Used in Last Simulation
- When users select Create New Configuration, the Create Resource Value Configuration page will appear. On the page, users will be able to enter the following information:
- Name
- Description
- Cloud Provider
- Scope
- Select Resource Type
- Label
- Tag
- Assign Resource Value
- When complete, users will select Save.
- Under the Connectors section, users will choose to Add a Connector, and the Add a Connector page will appear.
- In the Add a Connector page, users will enter the following information:
- Configure the Connector
- Connect to Connector
- Test Connector (Optional)
- When complete, users will select Create.

- In the Connect to…. (Example: Connect to AWS) section, users will complete one of the following:
- Download and review the Cloud Formation templates for the delegated role and the collector role.
- If the user configured the advanced options or need to change the default role names (aws-delegated-role, aws-collector-role, and aws-sensitive-data-protection-role), select Configure Accounts manually. Copy the Service Agent ID, delegated role name, collector role name, and the Sensitive Data Protection Collector role name. (Note: Users can't change the role names after they create the connection
- Users will not click Create. Instead, configure their environment.
- Once complete, users will Test the connector to verify that SCCE can connect to the environment.
- When finished, users will select Create.

- Under the Tier Details section, users will see their:
- Resource
- Tier
- Coverage Detail
- Billing Status
- Users can select to Manage their Tier by selecting the Manage Tier button.

- In the Manage Your Tier page, users can:
- Change Tier
- Review Services
- In the Change Tier tab, users can view their:
- Tier Subscription
- Pricing
- Feature Benefits
- In the Review Services tab, users can view their:
- View Current Services
- Enable/ Disable
- Update Your Tier
- If users select Update Your Tier, they will see an option to Upgrade or Downgrade their Tier Subscription. (Note: Please do not downgrade the Tier Level without contacting your Sales Team).
Relevant Documentation Links
Next Step: Security Command Center Enterprise: Step 2 - Visualization Overview
Previous Step: Security Command Center Enterprise: Step 1 - Administration Overview