


Table of Contents

Investigation
Google SecOps lets you investigate many different aspects of the information stored in your Google SecOps account. SecOps Investigation lets you to examine the aggregated security information for your enterprise going back for months or longer. Use Google SecOps to search across all of the domains accessed within your enterprise.

SIEM Search
The SIEM Search function lets you find events and alerts within your Google SecOps instance. SIEM Search includes a variety of search options that help you to navigate through your data. You can search for individual events and groups of events tied to shared search terms.
Steps
- Users will navigate to the left-side Navigation Bar and then select Investigation, which will display a dropdown menu.
- Select SIEM Search to display the SIEM Search page.
- On the SIEM Search page, users will be able to see a Search Query bar at the top of the page. Users can enter questions in natural language form.
- Example: “Find Externally Shared Documents with Confidential in the Title.”
- Once a Query is entered, users will select Generate Query.

- The Query will appear in the Terminal box below Search Query, showing Field and Operator.
- At the main part of the page, users will see the following options:
- Your Search History
- Your Saved Searches
- Searches Shared With You
- Users will have the following options:
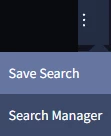
- Search History (Open Search Manager)
- UDM Lookup
- Lists
- Feedback on Generated Query
- Rewrite Query
- Case Sensitivity
- Date/ Time Range
- Run Search
- Search History (Open Search Manager)
- Once a Query has been generated, users will see three tabs in the main section of the page:
- Overview
- Events
- Alerts
- If there are results, a number value will appear next to each section tab.
- Overview tab results will show entity Overview data.
- Events tab results will show the following details:
- Trend Over Time
- Prevalence
- Filter Options
- Aggregations
- Grouped Fields
- UDM Fields
- Events
- Timestamp
- Event
- User
- Hostname
- Process Name
- Search Events
- To Search for Events, users will enter a query into the Search Events field and select Apply To Search and Run button.
- If an event is selected, users will see an Event Viewer to the right of the Event, consisting of:
- Entities
- UDM Fields
- Raw Log w/ option to Manage Parser.
- Under the Events Results section, users can download the Queried Events by selecting the Download as CSV button.
Relevant Documentation Links

SOAR Search
The SOAR Search page lets you find specific cases or entities indexed by Google SecOps SOAR. Google SecOps SOAR stores all case and entity information from cases, giving you the ability to retrieve information that may be relevant for what you are investigating.
Steps
- Users will navigate to the left-side Navigation Bar and then select Investigation, which will display a dropdown menu.
- Select SOAR Search to display the SOAR Search page.
- On the SIEM Search page, users will be able to see a Search Query bar at the top of the page. Users can enter questions in natural language form.
- Example: “Find Externally Shared Documents with Confidential in the Title.”
- Once a Query is entered, users will select Generate Query.
- The Query will appear in the Terminal box below Search Query, showing Field and Operator.
- At the main part of the page, users will see the following options:
- Your Search History
- Your Saved Searches
- Searches Shared With You
- Users will have the following options:
- Search History (Open Search Manager)
- UDM Lookup
- Lists
- Feedback on Generated Query
- Rewrite Query
- Case Sensitivity
- Date/ Time Range
- Run Search
- Search History (Open Search Manager)
- Once a Query has been generated, users will see three tabs in the main section of the page:
- Overview
- Events
- Alerts
- If there are results, a number value will appear next to each section tab.
- Overview tab results will show entity Overview data.
- Events tab results will show the following details:
- Trend Over Time
- Prevalence
- Filter Options
- Aggregations
- Grouped Fields
- UDM Fields
- Events
- Timestamp
- Event
- User
- Hostname
- Process Name
- Search Events
- To Search for Events, users will enter a query into the Search Events field and select Apply To Search and Run button.
- If an event is selected, users will see an Event Viewer to the right of the Event, consisting of:
- Entities
- UDM Fields
- Raw Log w/ option to Manage Parser.
- Under the Events Results section, users can download the Queried Events by selecting the Download as CSV button.
Relevant Documentation Links
Posture Management
The Posture Management dashboard helps you define, assess, and monitor the security of your resources. They help uncover policy drift, and detect misconfigurations. Maintain your organization’s security standards by applying postures to resources in a folder, project, or across your organization.
Posture Overview
The Posture Management dashboard helps you define, assess, and monitor the security of your resources. They help uncover policy drift, and detect misconfigurations. Maintain your organization’s security standards by applying postures to resources in a folder, project, or across your organization.
Steps
- Users will see the Posture Management dashboard, with three tabs available:
- Postures
- Templates
- Resource Groups
- In the Posture tab, users will see a Filter option that will provide users with the following Properties options:
- Name
- Posture Type
- Latest Revision ID
- Status
- Policy Sets
- Policies
- Create Time
- Update Time
- Categories
- At the top-right of the Postures list, users will see a Columns option
 with the same options as the Filters Properties options:
 - Name
- Posture Type
- Latest Revision ID
- Status
- Policy Sets
- Policies
- Create Time
- Update Time
- Categories
Relevant Documentation Links
- [All Steps] https://cloud.google.com/security-command-center/docs/security-posture-overview
- [Additional Steps] https://cloud.google.com/security-command-center/docs/security-posture-overview#security-posture
Findings
The Posture Management dashboard helps you define, assess, and monitor the security of your resources. They help uncover policy drift, and detect misconfigurations. Maintain your organization’s security standards by applying postures to resources in a folder, project, or across your organization.
Steps
- In the Templates tab, users will see a Filter option that will provide users with the following Properties options:
- Name
- Latest Revision ID
- Status
- Policy Sets
- Policies
- Categories
- At the top-right of the Templates list, users will see a Columns option
 with the same options as the Filters Properties options:
 - Name
- Latest Revision ID
- Status
- Policy Sets
- Policies
- Categories
- If users select a Template by clicking the Display Name, they will see a Posture Template Details page of the selected Template with the following:
- Template Details
- Policy Sets
- In the Policy Sets section, users will see a Filters option that will provide users with the following Policy Sets options:
- Policy Sets
- Policy Name
- Type
- Description
- Enforcement Type
- Standard
- In the Policy Sets section, users will see the following Columns:
- Policy Sets
- Policy Name
- Type
- Description
- Enforcement Type
- Standard
- Constraint
- Under the Constraint column, users will be able to View Constraint Details.

- The Constraint Details panel that appears is a Read Only JSON version.
Relevant Documentation Links
Resource Groups
The Posture Management dashboard helps you define, assess, and monitor the security of your resources. They help uncover policy drift, and detect misconfigurations. Maintain your organization’s security standards by applying postures to resources in a folder, project, or across your organization.
Steps
- In the Resource Groups tab, users will see a Filters option that will provide users with the following Resource Groups options:
- Name
- Data Assets
- Created On
- Created Before
- Created After
- At the top-right of the Resource Groups list, users will see a Columns option
 with the same options as the Filters Properties options:
 - Name
- Data Assets
- Posture
- Created On
- If users select a Resource Group, by clicking the Display Name, they will see a Resource Group Details page of the selected Resource Group, with the following:
- Resource Details
- Data Assets
- At the top of the Resource Group Details page users will see the following options:
- Remove From Posture
- Delete
- In the Data Assets section, users will see a Filters option that will provide users with the following Data Assets options:
- Name
- Project
- Location
- Asset Type
- At the top-right of the Data Assets list, users will see a Columns option
 with the same options as the Filters Properties options:
 - Name
- Project
- Location
- Asset Type
Relevant Documentation Links
Investigate Cases & Alerts
Google SecOps ingests alerts from a variety of sources. Each alert is ingested with its underlying base security events. Those security events are analyzed, and their indicators, such as sources, destinations, and artifacts, are extracted into objects called entities. Each entity stored in the platform starts collecting data on it, including comments, enrichment data, and reports, allowing analysts yo review this history when handling future cases involving that entity.

Working Cases
Google SecOps Cases provides the analysts a way to investigate the incoming security alerts and safeguard workstations. Analysts can create manual cases and simulated cases and ingest specific data.
Steps
- Users will navigate to the left-side Navigation Bar and then select Cases.
- On the top-left of the Cases page, users will see several options to navigate through Cases:
- Cases View Selection

- Refresh Cases

- Switch to Default Mode

- Sort By

- Cases Filter

- Search Case Name
- Cases View Selection
- When users select the Cases Filter, users will see a Case Queue Filter popup, which will display the following sections/ fields:
- Parameters
- Logical Operator
- Add Criteria
- Save Filter
- When a Case is shown as a result, it will appear in the left-side bar.
- When a Case is selected, a popout page will appear.
- Cases will have an assigned:
- Case ID Number

- Environment
- Tier designation

- Date/ Time Range
- Case ID Number
- At the top of the Case page, users will also see the following options:
- Incident
- Close Case
- Case Actions
- Manage Tags
- Each Case will have three views:
- Overview

- Case Wall

- Case Details
- Overview
- To the right of each View are the following options:
- Manual Action

- Case Tasks

- Alert Options (only in Case Details view)

- Manual Action
- In the Case Overview, users will see a Finding Summary of the of the Case, consisting of:
- Name
- Finding Description
- The Next Steps You Should Take
- There are additional sections below consisting of:
- Finding State
- Pending Actions
- Alerts
- Entities Graph
- Entities Highlights
- Latest Case Wall Activity
- Recommendations
- Statistics
- Comment Section

- Option to Attach File
- The Case Wall view will allow users to view the Case Details:
- Actions
- Status Changes
- Tasks
- Comments
- Insights
- Pinned Chat Messages
- Favorites
- Each Case Detail can be marked as a Favorite.
- There are Filter options in Case Wall view:
- Alert Type
- User
- Sort By Date/ Time
- The Case Details view has four tab options:
- Overview
- Events
- Playbooks
- Graph
- The Overview tab in Case Details will display information consisting of:
- Finding Summary of the of the Case, consisting of:
- Name
- Finding Description
- The Next Steps You Should Take
- Detection Time
- State
- Severity
- Resource Type
- Resource Path
- Owner
- Comment Section
- Option to Attach File
- Events
- Finding Summary of the of the Case, consisting of:
- The Events tab will display a list of Events, consisting of:
- Name
- Type
- Source/ Product
- Artifacts
- Port
- Outcome
- Time
- Option to Configure Event
- Under the Playbooks tab, users will see the following options:
- Refresh
- Jump to Case Wall
- Add Playbook
- All selected Playbooks will show in the side-bar under Playbooks.
Relevant Documentation Links
- [All Steps] https://cloud.google.com/chronicle/docs/soar/investigate/working-with-cases/cases-overview

Your Workdesk
Google SecOps Workdesk is the first step in taking care of your SOC daily routine. Your Workdesk allows you to manage your cases, collaborate with your team members, and quickly respond to manual actions in the Playbooks.
Steps
- Users will navigate to the left-side Navigation Bar and then select Your Workdesk.
- On the top-left of the Your Workdesk page, users will see three options:
- My Cases
- My Tasks
- Announcements
- Users view Cases in the My Cases tab, through four sections:
- Assigned to Me
- Assigned to My Role
- Mention of Me
- Mention of My Role
- At the bottom of the My Cases page, users can Refresh the list, by selecting Refresh.

- Users can view/ create their Tasks in the My Tasks tab, with four sections:
- Status
- Assigned to Me
- Assigned to My Role
- Created by Me
- The My Tasks page also has a Search Function.
- Users can view/ create their Announcements in the Announcements tab.
- The Announcements page also has a Search Function.
Relevant Documentation Links
- [All Steps] https://cloud.google.com/chronicle/docs/soar/overview-and-introduction/your-workdesk/workdesk
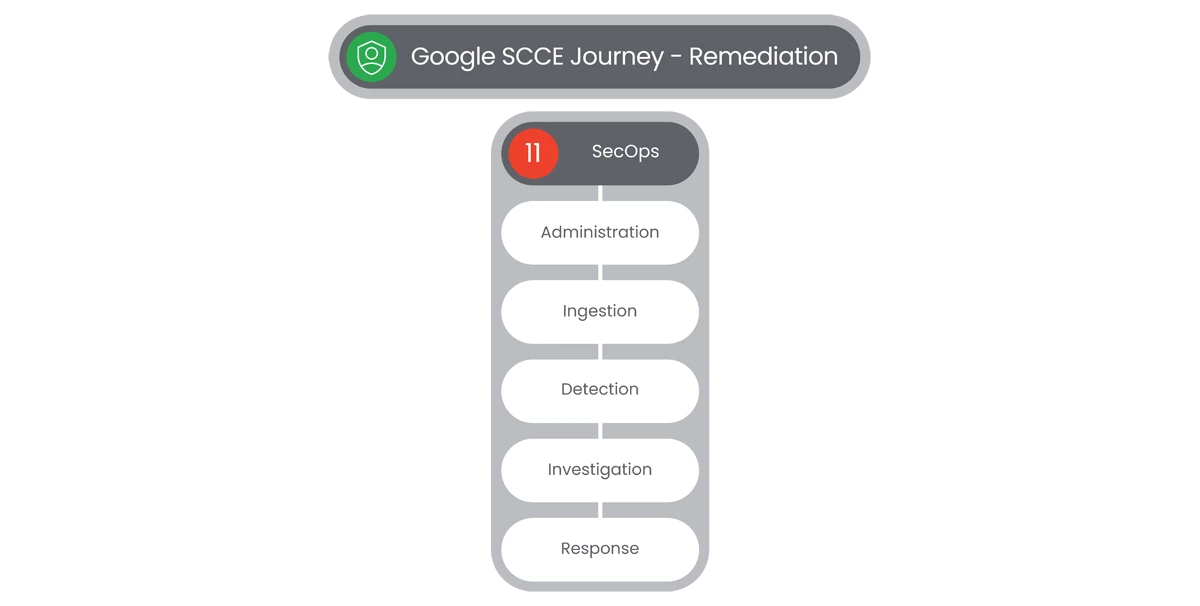
Next Step: Security Command Center Enterprise: Step 4.1.5 - Remediation | Google SecOps | Response
Previous Step: Security Command Center Enterprise: Step 4.1.3 - Remediation | Google SecOps | Detection